Education anyone?
Someone with absolutely no understanding of what an education is for…lol.
Stuart Smith 28 minutes ago
Training and apprenticeships are important elements in our future. Good on AB’s government for spreading some of the lolly around to small business rather than simply massively subsidizing universities who produce workers absent marketable skills. But universities do produce lots of inside hands reaching out for a lifetime defined benefit fully indexed pension.
— Comment section
https://www.cbc.ca/news/canada/calgary/jason-kenney-jobs-announcement-alberta-second-stage-1.6242690
Pi update
…Because I know you care 🙂
 When last we left our intrepid Pi I had listed the software I had running on it. Here’s a quick recap of what that install was with a few of the missed out bits:
Pi 4 Model B with 8 gb of ram
5oo gb external
-
- Ubuntu 21.04
- Shairpoint-sync music server
- Nginx Proxy Manager
- Webhost Apache/php
- MySql server
- Pi-Hole
- Nextcloud server
- Samba File Server
But after watching a few videos (Novaspirit tech’s Pi series) and playing around with Docker a bunch more I basically redid the whole thing from scratch. So that makes the above info completely redundant 😉
SD backups
A word about installs and backups. One of the things I am especially happy about with the move to a Pi is the ability to image SD cards. It took me a while to get my methodology straightened out but here it is
Step 1: Install base operating system
I currently have two base installs:
- Ubuntu 21.04 — this is a GUI-less (command line only) install of the Ubuntu linux distro. It has become my main system.
- Ubuntu 20.04 Mate — this is the Ubuntu install with the MATE desktop and apps suite. I have pretty much abandoned this.
Set up server (this is for the headless Ubuntu):
- change host name
- add user
- set static IP
- install and set up Samba
- install and set up Docker & Docker Compose
Step 2: Create an image
After I had everything installed and set up, it’s time to make an image of the SD card. Shutdown the computer and and pop the SD card into the MacBook SD slot.
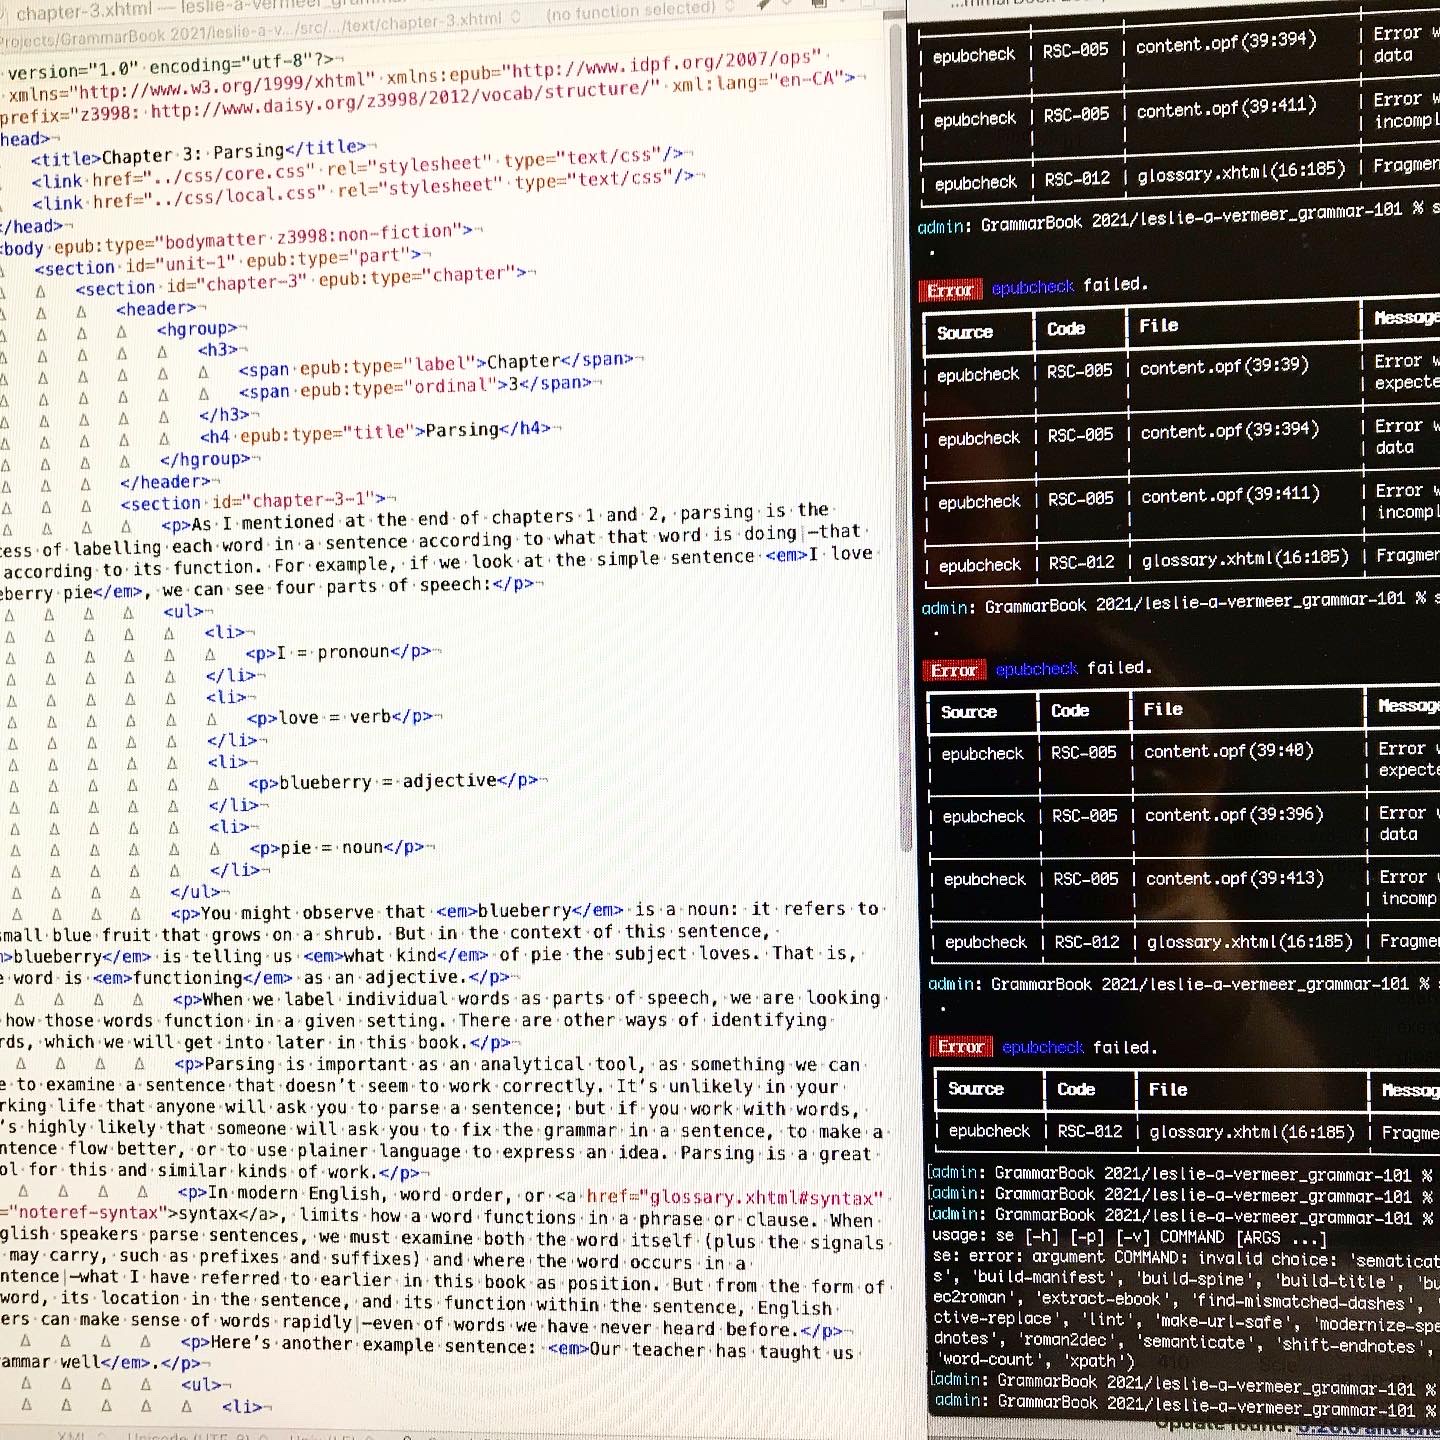
Open Terminal and use dd to make an image:
sudo dd bs=1m if=/dev/rdisk2 of=/Users/admin/Desktop/pi-server.img
To parse this, it is basically saying: using root permission (sudo), make an image (dd) using 1 megabyte blocks (bs=1m) of the disk labeled disk2 to a file on the desktop named pi-server.img
This can take a long time depending on the size of the disks. With a lot of trial and error I settled on using my 32 gb SD card to make these images from and it takes around 400 seconds (6.7 minutes). When I tried with both the 64 gb card or even worse the 500 gb hard drive the time sometimes was in the hours. Which was ridiculous because most of that copy time was copying blank space.
What this means is I have to make all my changes to the install on the 32 GB card, which may mean redoing them since I generally make them first on the hard drive install. But it works for me as it forces me to a) document the changes I am making and b) do them several times which helps me ingrain them in my memory.
This leaves me with 32gb disk image on my laptop that I then re-image back to the 500GB hard drive — which is a pretty quick process.
I repeat this process whenever I make a major change to my setup so I can revert back anytime I screw something up (which thankfully is happening less and less).
The new install
This time I started with the base install described above (Ubuntu, Samba for file sharing and Docker to host containers), made an image and then moved on.
Docker
As I said in my Drop Dropbox? post, Docker is is a sort of virtual containerizing system. Rather than a true virtual machine (which acts as a completely different physical machine complete with OS and hardware configs), a container is an isolated “box” into which you install your applications and whatever settings they need. The Docker host manages the network interfaces and whatever other i/o you need. The beauty of this is you can install all sorts of support programs or drivers without affecting — or in my case, screwing up — the rest of the system. If you don’t like it or make a mistake, you just shutdown the container and delete it and poof, it and all its resources are gone.
Portainer
 One of the things that made me switch to an almost completely Docker-based setup was the discovery of Portainer, which is a web-based GUI that allows you to manage all your Docker containers without having to understand the often complex and arcane Terminal commands used to invoke and manage them.
Oddly enough Portainer itself is a Docker container so that mean you have to do thing the hard way at least once. Create a docker volume (docker volume create portainer_data to store the app data on) and then run:
docker run -d -p 8000:8000 -p 9000:9000 --name=portainer --restart=always -v /var/run/docker.sock:/var/run/docker.sock -v portainer_data:/data portainer/portainer-ce
And you are done. Sign into the system by typing http://<insert IP address>:9000 and you should be good to go. Here’s a screen shot of all my containers at the moment:

NGINX Proxy Manager
Next up was a reinstall of NGINX Proxy Manager to manage SSL and routing. You can read about it in the NGINX Proxy Manager post.
One difference in this install was I used Portainer to install it as a Stack (a group of associated programs). This meant the NGNIX program and its associated Maria database were installed in separate containers that were linked together so they could be managed as a unit.
Then I reinstalled the Portainer container so it was using the same virtual network as NGINX and they now all talked to each other securely and happily.
Homer
An app called Home was recommended by several sources so I decided to give it a go. Home is a lightweight dashboard that allows one to have a convenient starting place for what is rapidly becoming my HomeLab. It runs off a simple yaml (stands for yet another markup language) text file.
You just add an entry like
- name: "Boat Search"
logo: "assets/tools/swan.png"
subtitle: "Utility to search Yachtworld"
tag: "pythonapp"
url: "192.168.1.3:8889"
target: "_blank"
And it adds another item to your dashboard.

Then I added a Samba entry to allow me to change the config.yml file and drop in additional icons
**MAKE ANOTHER IMAGE**
LAMP
With that done I installed my lamp stack again (Linux, Apache, Mysql, and php) to redo my test websites. I decided not to do this in a container as I figured it wasn’t going to change.
**MAKE ANOTHER IMAGE**
Shairport
Currently I am having issues with the dockerized version of this. The sound cuts out every once in a while and I can’t figure out why. I may go back to the direct install from What’s your Pi doing? and see if that solves the issue. But for now I have it as a Docker container—but disabled.
NextCloud
 (See Drop Dropbox?) Again this is now purely Docker based and the install was super easy using Stacks. I can turn it off and on as I like and see how much of my Pi’s resources it is using.
YouTube DL
 This one is new. I had this app installed on my Mac mini as it allowed me to download favourite YouTube videos for offline watching. But now I can use it with a web interface. I haven’t played with it much, but I expect it will be much more convenient than the command line version. (Note: I have subsequently had problems with this leading me to discover that YouTube is throttling the app. The first few videos go fine then it drops down to a snail’s pace rendering it almost unusable.)
**MAKE ANOTHER IMAGE**
Python Apps
I built a python/flask app to calculate Bus Fares for L and decided to see if I could dockerize it. It worked out pretty good and so I added it to the mix so L could use it. Again the ability to manage it and turn it off and on will be a bit of a godsend as I develop it further.

The apps needed python and a webserver (I tried to use nginx but ended up going back to gunicorn — I was having trouble with uwisg in the container). It took some fussing as the resulting containers were initially 800 mb but eventually I knocked them down to a sixteenth of that size.
I also decided since that worked so well I would take my boat search app (If you can’t boat, dream…) that was hosted on the Google Cloud and move it to the Pi. And in the end I was able to share the python container between the two apps.
**MAKE ANOTHER IMAGE**
Grafana & Prometheus
Last but not least I wanted to be able to track some data about usage and load since I was now adding quite a bit onto the poor ~$100 Pi. A bit of research, one last Stack, and I was good to go.
Prometheus is an application that collects data from your machine. It can organize and store a ton of stuff and is so complex I ended up just stealing others’ setups. It uses plugins (I installed cadvisor and node_exporter) to collect specific data. The two I have monitor the docker containers and things like the cpu/temperature/network stats from the Pi.
Grafana is a web interface the graphically displays a dashboard with whatever data you managed to collect with Prometheus. Also complex and the config is again “borrowed.”

Très cool.
**MAKE ANOTHER IMAGE**
So that’s it for now
Everything is humming along splendidly now. I still have the issue of Shairport to deal with but that is minor. I can go back to any of the multiple images I have and start over from there or simply delete a container and not have to worry about residual crud interfering with future installs.
I have tested docker containers for things like my Calibre library which I might potentially move off my Mac mini and am looking into OpenVPN and an online FileBrowser. But that’s all for the future.
I am a happy camper. But I wonder if I should get another Pi… hmmm…
Calibre: Lost and Found
After the most recent update to Calibre Web I had an issue logging in. In true me-fashion I screwed around for a bit and then tried reinstalling. It worked. However that overwrote the database that held all my settings and poof! — all my shelves were gone. That was a listing of all my books read from 2015 to now. Grrr.
(As a side note, just as I was mildly panicking about this, L plaintively called my name and informed me she had lost her much beloved sapphire in the garden bed. So off I went to hack and slash the flowerbed to look for it. Luckily a) it’s fall and it needed hacking and slashing and b) it only took about 15 minutes to find it. So all’s well on that score.)
Anyway back at my desk, I was a bit annoyed and went digging around in the file repo (always doing things the hard way…) to try and find where the shelves and their contents might be stored and if they were recoverable. Eventually I realized two small, but significant facts: 1) I had for some odd reason copied the calibre-web folder before reinstalling—I almost never make backups… I must be learning finally! and 2) there is a handy FAQ… duh.
https://github.com/janeczku/calibre-web/wiki/FAQ
What do I do if I lose my “Admin” password?
If there are more than on admin on your instance any other admin can generate a new password for your account. If the only admin forgot his password: You are in trouble. Currently no password reset function is implemented. The only option would be editing the password in the app.db with a sqlite Database editor, or starting from the beginning.How to Backup Calibre-Web Settings?
All settings of Calibre-Web are stored in the app.db in the root folder of the project.If you are using Google Drive as ebook storage than you also need to backup the gdrive.db, settings.yaml and gdrive_credentials files.
So obviously the info was in the app.db file! I then spent about 15 minutes trying to download a SQLite editor (DB Browser for SQLite https://sqlitebrowser.org/dl/) via brew (brew install --cask db-browser-for-sqlite) which helpfully installed an app in the Applications folder. Then I dug around for another 5 minutes trying to figure out the SQL statement to import the data from the backup database into the active database until the lightbulb went off (of the low wattage LED variety if that matters) it occurred to me that was completely unnecessary.
Just copy the backup app.db over the current app.db you idiot…but make a backup first!
So I did.
And it worked.
All’s well that ends well.

Instagram Since Last Time


Open Source
L needs a textbook for a course. Her go-to is now out-of-print. Last year she used an open-source textbook from UBC in a different course and was keen on the idea.
So she wrote one.
And I get to make it a book.
 Making an epub/pdf text

So it’s been a scramble because she was still writing while I was trying to adapt the tools (standard ebooks toolset) I usually use to fit the new model. Eventually she wants to host it with the MacEwan OER repository and that might mean moving it over to Pressbooks which they use for publication and version management, but for now I was just going to stick with what I knew best. And frankly Pressbooks has turned into one of those things like Microsoft Word that tries to do too much in a way that appeals to the lowest common denominator and ends up being more confusing than helpful.
So I stuck with my own tools for now. My intent is to produce a epub/azw files and then covert back into pdf. It sacrifices a bit on the design side but it ensures clean epub files and, after all, its only a text book—and a free one for that.
Process
Step one was revising the Standard file templates so I could continue to use the tools without anything hiccuping (thanks Alex for all the latest revision that have facilitated that!) and building out the extra components.
This meant adding a glossary (and associated linking system), a table of contents (because Standard eschews them for the built-in version), answer keys (again with associated links back to the exercises), a bibliography and an About the Author page. Pretty much everything else came straight from the basic templates I usually use.
I also had to go through and change and adapt things like logos, metadata that referred to Standard Ebooks and their imprint and colophon. I also had to remove all the references to the custom Standard Ebooks semantics, redesign the cover build tool and research and ask some question in regards to the more complex hierarchy (again, thanks Alex!).
Challenges
To get this:
You need to produce this:
The single biggest issue I encountered (and this will be a surprise to absolutely no one who has had to do any kind of design) was…wait for it…Microsoft Word. Gawd, what a monstrosity. All I wanted to do was export files that had the appropriate heads, bulleted and numbered lists and text that was highlighted or underlined while retaining italics and bolds.. This is among the simplest and most basic html markup you can do. So you’d think that one of the many export to html functions. built into Word would be able to accomplish that, wouldn’t you?
Nope.
At worst I got massive amounts of unnecessary gobbledy-gook that still didn’t retain the list format and at best I got a cleaner file that apparently at random either retained the list format or translated the it into some complex css while turning the highlighted text into increasing more bizarre span links. But it wasn’t much of a surprise as there are tons and tons of Word -> html utilities out there and why would they exist unless to try and solve a problem that was pretty universal.
I looked at bunch of them but soon found that even that wasn’t going to work. Most of the rely n a copy form Word and past into an instance of tiny mce editor (a web utility to allow you to write and format text). After converting most of the files I discovered it had a weird glitch that dropped words in the last line of a list if it had any formatting applied. I didn’t look into exactly what the issue was but it occurred in all of the converters I could find.
Back to the drawing board.
In the end I exported all the Word files to .rtf files and then copied and pasted them into this converter. I was careful not to clean the html as that lost me some of my formatting. This left me with somethin like this:
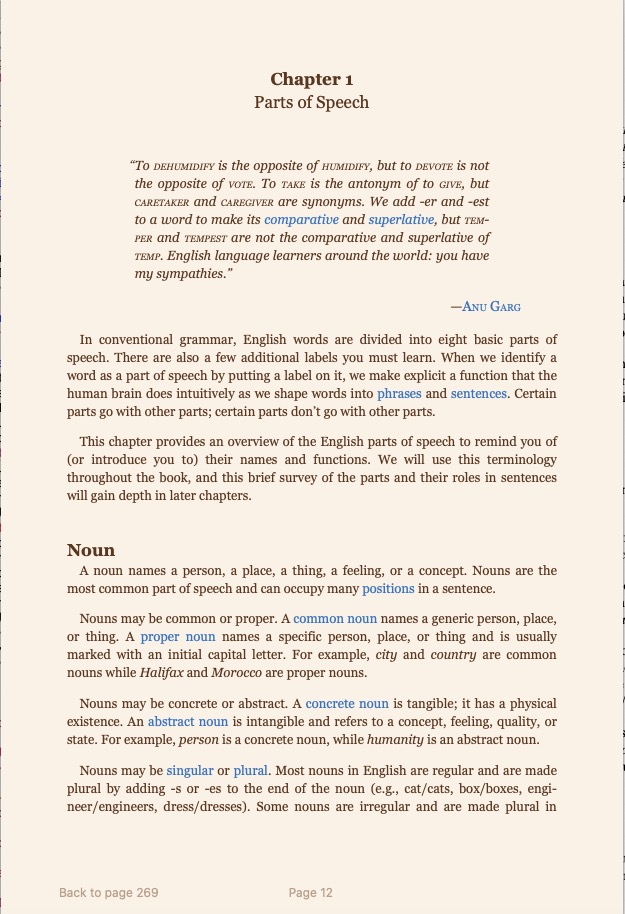
<p class="p1">Chapter 1: Parts of Speech</p>
<p class="p2"> </p>
<p class="p1">In conventional grammar, English words are divided into eight basic parts of speech. There are also a few additional labels you must learn. When we identify a word as a part of speech by putting a label on it, we make explicit a function that the human brain does intuitively as we shape words into phrases and sentences. Certain parts go with other parts; certain parts don’t go with other parts.</p>
<p class="p1">This chapter provides an overview of the English parts of speech to remind you of (or introduce you to) their names and functions. We will use this terminology throughout the book, and this brief survey of the parts and their roles in sentences will gain depth in later chapters.</p>
<p class="p2"> </p>
<p class="p1"><h2> Noun</p>
<p class="p1">A noun names a person, a place, a thing, a feeling, or a concept. Nouns are the most common part of speech and can occupy many <span class="s2">positions </span>in a sentence.</p>

<p class="p1">Nouns may be common or proper. A <span class="s2">common noun</span> names a generic person, place, or thing. A <span class="s2">proper noun</span> names a specific person, place, or thing and is usually marked with an initial capital letter. For example, <em>city</em> and <em>country</em> are common nouns while <em>Halifax</em> and <em>Morocco</em> are proper nouns.</p>
Which was pretty easy to clean up.
Everything from then on went pretty smoothly. From raw text to a complete (albeit badly formatted) textbook was less than half and hour after I got the chapter templates set up.
The Fiddley Bits
- It needed a cover. I had a quick concept so that didn’t take long and the “client” was not fussy.
- It needed some internal links from word -> glossary and then glossary -> originating word and frankly this second bit took the most time of the whole project, as I didn’t know which chapter the word came from so I had to search each term and then edit the backlink. But it was only a couple of hours work.
- I had to do some research on Pressbooks to make sure I could convert the book later if I had to. I can.
- I also had to look at/for Library and Archives Canada’s list of Canadian Subject Headings (CSH) as I was used to the Library of Congress. Now there was a rabbit hole… or more accurately a morass. What a mess! I ended up just using BISAC codes.
- Figuring out how to convert to pdf. In the end I went with this online tool and then edited the resulting pdf in Acrobat to add page numbers and footers. It still had some bad page breaks but overall it made a pretty nice text.
- Custom css. I am still working on tweaking this. I want to keep it simple but still add a bit of functional design to make it easier on the eyes.
What’s Next
Well, L is going to pilot the 1.0 version this fall with her current class and in the mean time it will go out for peer review to various people. After any revisions and updates she hopes to add it to the OER network for others to also use as a teaching tool.
I will post up the links to the files when I get everything done and reviews are in.
I just don’t understand
What’s your Pi doing?
What am I doing with my Pi? Quite a few things actually. I installed the driver that lets it boot off an external USB drive and now it runs off the old 500gb drive from the old linux box—so there is plenty of room. Might as well use some of it.

Below is my current list (for posterity). One thing to note is it is all perfectly free and open-source—which I find beyond impressive.

Shairpoint-sync music server
This cool piece of software turns the Pi into an Airplay receiver. Since we run our household audio through Apple’s airplay system this means we can now also stream the household music to the Pi and have it output it.

L is 98% in charge of the daily music which means while she can listen to her tunes at her desk (with her desktop speakers) and through the house network (which currently has speakers in the kitchen, living room, tv room, upstairs bedroom and upstairs bathroom), I am usually listening to the audio from speakers located down the hall. By outputting the Pi’s audio into my desktop speakers I can now listen to the sound right here at my desk.
I had to write a small shell script to turn the audio off when I wanted to watch a youtube video or listen to my own music but so far its a pretty cool feature. Note: the Pi gets cranky with wanting to output the audio through its hdmi port and sometimes the solution is not seamless.
Nginx Proxy Manager
I have written about this and it is so cool to be able to route and reroute network traffic with a few clicks whenever I change something. So far it is forwarding 5 different domains to various computers and ports around the house.
Webhost Apache/php (2 sites)
The Pi currently runs 2 “test” websites that I use for development. This is what they currently look like but that changes whenever I have a new project.


A typical Apache/php install so nothing impressive but it gives me a lot of flexibility and is plenty fast enough for the minimum amount of user that will ever see it.
MySql server
This is really just an adjunct to the above install. Along with php, having a mysql database serve makes making dynamic websites easy. But I got into mysql because I could no longer run Filemaker on my computer anymore so I tend to treat it as a separate entity when I want to build database.
Pi-Hole
This one is still in development and I am the only one using it. Essentially what it does is route all the web traffic to my computers through the Pi and blocks all the ads.. I was already doing this on my desktop using the Brave Browser but now it should theoretically work on my phone, Apple TV, and all the rest of the computers while allowing people to use whatever browser they want.

It isn’t fully implemented yet mostly because I still restart the Pi a lot and it would take down the ability for people to use the internet whenever I did that. I can hear the screaming now!
Nextcloud server
I just posted about this. Again I’m not likely to implement this other than in a small way but it has so far been interesting to use. It auto posts any new images I take with my phone so I no longer have to sync it up manually and gives me a place to stuff files I want to share. And with the big hard drive theoretically I could store a lot of stuff there although that might mean speeding up the network etc to make it truly functional.
So we will see.
Samba File Server
The Pi is also set up as a file server using samba (which just means it’s compatible with apple, windows and linux). I have used it for temporarily moving files around but until I get some sort of RAID (Redundant Array of Independent Disks) and backup set up I am not likely to use it to store anything important.
Drop Dropbox?
Are we tired of computer posts yet? My Pi acquisition, along with a growing interest in linux and open source software has been taking up a lot of my time lately. And I need to write this stuff down, since that was one of the reasons why I started this blog, way, way back when… It’s sort of my backup memory for all things computer related. So you get to suffer.
Control my Data?
Speaking of why, having control of my own data has also been a big thing with me. Part of it was a lack of belief that the Googles or Apples of the world would last (and I’ve mostly been wrong about that) and that my images/blog/posts etc. would still be accessible a decade later… The blogspot blog I started back in 2002, is still going strong and L still posts to it sporadically. Still, I regularly download my Facebook info, repost all my tweets and instagrams to this site and have hosted this blog on servers I control since day one.


With the advent of cloud sharing controlling your own stuff became much more complex. I fell immediately in love with Dropbox. But I was initially (and still am to a certain degree) very cautious about what I put on their servers. It’s hard not to imagine some nameless drone rifling through my folders because he/she was bored. These days I am a bit more knowledgeable and this a bit more optimistic but still… the amount of leverage governments have over corporations should not be underestimated. (This is an interesting article about information sharing agreements between countries and highlights a few instances where they have pressured companies to not only spy on clients/customers but also not be allowed to disclose that they are doing so.)
Honestly, at the end of the day, I am not that paranoid, and don’t actually do much that any government agency would be interested in … but ya know…frankly, its none of their damn business… And I just don’t want anyone erasing or altering what is mine without me having my own copies. 😉
NextCloud
Anyway, back to Dropbox (and Google Drive—which makes me crazy although recently it’s gotten better—and iCloud and even Microsoft OneDrive to name the services I have access to). I’ve always wondered if I wouldn’t be better off using some sort of cloud/NAS (network-attached storage) of my own to store my stuff but it hass always turned out to be too much money for not enough security. (And basically that is still true, despite what the rest of this post implies.)
But a few days ago I discovered Nextcloud.
Apparently its just one of a bunch of self-hosted cloud solutions but it had good reviews so I decided to look into it. And wow. Just…wow. Totally open source and free; with desktop and mobile client apps and enough functionality that you could replace the whole google suite: mail, documents, sharing, calendars etc.
Download it, make some space on a hard drive, install it and forward a url to the computer and voila..your own personal dropbox service!
After a bunch of tinkering (I got stubborn and wanted to run it in a Docker container and that made my life much harder than it had to be) and it is now running happily on my Pi (and mac and iphone). I can now take a picture with my phone and have it synced to my desktop moments later. I also have a shared folder set up with L so anything I put in that folder appears in her setup as well (we use this function on Dropbox quite a lot to move files from her ecosystem to mine and back). I’ll be testing and playing with it for the next few weeks just see how well it runs.
The Pros and Cons List
Pros:
- pretty darn private and all on my own physical hard drives.
- unlimited space (at least until I fill up the drive)
- free
- easy to use and setup (at least the client part of it)
Cons:
- not quite as secure as it could be although I am using ssl and looking into encryption which is available
- not guaranteed 24/7 uptime since its on my server and Shaw’s network
- I would need a separate Pi, and a couple of new harddrives to mirror each other if I was actually going to use it instead of Dropbox…which takes it from free to ~$200–300
A word about Docker
Docker is a sort of virtual containerizing system. You can install whatever software you want to run in the “container” and it is separated from the rest of your machine. That way you can install things and be assured they won’t screw with the rest of your setup. The disadvantage is that being separate, it is harder to get things to talk to each other.
Since NextCloud needed to talk to outside my home network and vice versa, it needed to go through Nginx Proxy Manager which also ran in a Docker container. They didn’t really want to talk to each other as they were on “different” networks. After much fussing I had to take down my original Nginx container and make a new one that ran both Nginx and Nextcloud in the same container in order to get it to work. That means if/when I abandon NextCloud I will have to set up Nginx all over again.
Launch CalibreWeb automatically on boot
In an ongoing attempt to make some of my systems automatic and bullet-proof I decided to try and get my CalibreWeb server to boot at startup. This, in conjunction with my autofs setup should have made my CalibreWeb site able to withstand a reboot of either the CalibreWeb host or the computer hosting the database (see below for more on this).
Normally on a Mac (and this is hosted on my old Mac mini which serves as our media server) you just add the program to Login Items in the User control panel and voila.
But since CalibreWeb is a python program and needs to be executed via command line this is a bit tougher. A bit of googling and this is the solution I came up with…
Make a plist
<?xml version="1.0" encoding="UTF-8"?>
<!DOCTYPE plist PUBLIC "-//Apple//DTD PLIST 1.0//EN" "http://www.apple.com/DTDs/PropertyList-1.0.dtd">

<plist version="1.0">
<dict>
    <key>Label</key>
    <string>calibre.launcher</string>
    <key>ProgramArguments</key>
    <array>
        <string>/usr/local/bin/python3</string>
        <string>pythonweb/calibre-web-master/cps.py</string>
    </array>
    <key>StandardErrorPath</key>
    <string>/var/log/python_script.error</string>
    <key>KeepAlive</key>
    <true></true>
</dict>
</plist>
The first array string is where your python executable resides — in my case python3; the second array string is where your calibre-web executable is. I am not sure but I think that the Label string needs to match the file name — at least that seems to be the standard.
And Then
Save it as something like calibre_launcher.plist
Then you need to copy it to: ~/Library/LaunchAgents/ Apparently you can do it also to /Library/LaunchAgents/ but I couldn’t seem to get the permissions correct to be able to do that. And since the computer always boots into a specific user it was ok in the user library folder.
I also had to fix permissions: chmod +x ~/Library/LaunchAgents/calibre_launcher.plist to make it executable and run: launchctl load ~/Library/LaunchAgents/calibre_launcher.plist to activate it. (You can also run: launchctl unload ~/Library/LaunchAgents/calibre_launcher.plist to remove the script from the launch queue.)
Now it should run whenever you boot up.
CalibreWeb Update
It all works. But… it seems if I break the connection between the CalibreWeb python script and the database it won’t recover even when the database becomes available again. So ultimately if I reboot my main computer I still have to restart the CalibreWeb python script.
I currently do this with a bash script (actually I think its now a zsh script…lol). It ssh’s into the media server, kills the python script and then restarts it. Note: I have ssh set up with key pairs so I don’t need to have my password in the script.
#!/bin/zsh

echo "pkill -f /pythonweb/calibre-web-master/cps.py" | ssh '<USER>@mini-media-server.local' /bin/zsh
echo "Killed Calibre Web..."
echo "/usr/local/bin/python3 /pythonweb/calibre-web-master/cps.py &>/dev/null & "  | ssh '<USER>@mini-media-server.local' /bin/zsh
echo "Restarted Calibre Web..."
Save the above as a text file called something like restartcalibreweb.sh and then chmod +x restartcalibreweb.sh to make it executable. Then you can just double click on it whenever you need to restart the remote CalibreWeb python script. The next idea is to make this script run at bootup as well, but I am as yet unsure if the autofs solution will reload the share before this script runs. If it doesn’t then the CalibreWeb will restart but give me the “locate database” screen because it can’t find the share and I will still have to vnc in to the media server and reconnect.
Note from future self: I never did get this to work properly. Sigh
Trials and Tribulations: the Pi edition
Making my Pi

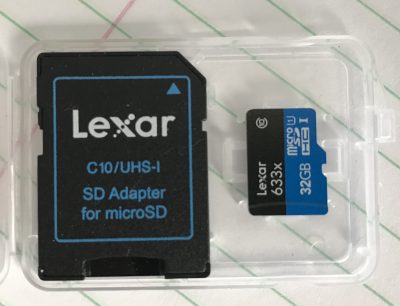
A Pi is just a tiny board in a box. At minimum you also need a power supply and a micro SD card to make it go. Better yet you should have a case, at least some heat sinks and maybe a fan. You will also need a HDMI -> mini HDMI cable if you plan on using a monitor and of course a usb keyboard and mouse. Above is everything I got in my kit (except the power supply which I forgot to include in the pic).
Assembly is pretty easy. Screw the board to the case; screw the fan to the lid; stick the heat sinks on using the self-adhesive pads; plug in the fan to the indicated pins and screw the case together. The only issue was a quick google said the 5v fan was a bit noisy and could be made a bit quieter by setting it up as a 3v fan. That meant figuring out which pins on the I/O board to use—which wasn’t much of a chore.
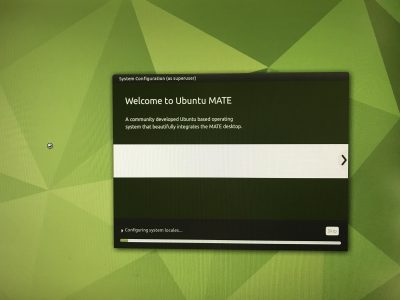
Flashing
Then you need to download an OS. I chose to go with Ubuntu MATE rather than the traditional Rasbian OS. Simply go to ubuntu-mate.org/download/arm64/ and download the iso file. At this point in time you can choose between 20.04.2 LTS or 20.10. What this means is the LTS (long term support) version is going to be supported at least until April 2023, so if you don’t want to be bothered with updating — you are good for a couple of years. The 20.10 version will need to be updated regularly to ensure everything is secure (actually when I did my download it stated it was only supported to July 2021).
Then you need the Pi Imager software which you can download for your working OS (I chose macOS) as I was working off my Macbook.
After that, insert your SD card in your computer (my Macbook has a regular SD card reader and I have adapters.)
Select the downloaded iso file, select the destination as the SD card and hit “write.” It will completely rewrite the disk so don’t leave anything you need on it. It takes ~5 minutes to write and verify a 32 gig disk.

When it’s done, pull out the micro SD, insert it into the slot on the Pi and power up the Pi (assuming you have already attached a keyboard, mouse and monitor via the micro HDMI port). For convenience you might also attach a network cable but it will ask to setup your wifi if not.
Boot
The boot screen will ask for your language preferences, user name and password, wifi setup if necessary and that’s pretty much it. You will presently have powerful little computer all ready to go, with pre-installed Libre Office, Firefox and more.
The thing that will take the most time is updating all the packages (software) once you are setup — something highly recommended. It might take up to 10 minutes or so to get everything current, especially if you opt to update to the new 21.04 release. And voila! C’est tout.
Advanced Setup and My Beefs
Of course that’s not really everything. I wanted to setup up a few extra things.
- VNC so I could remote into the Pi desktop without a keyboard or mouse,
- ssh so I could remote in via terminal,
- Barrier, a software KVM (keyboard/video/mouse) so I could share my keyboard between my Mac and the Pi without having to unplug it every time,
- Samba to share files,
- a web server,
- my NGINX Reverse Proxy,
- and backup images of my disk(s).
About half-way through I, as previously mentioned, decided to abandon MATE and go for a pure Ubuntu server install with no graphical desktop. I did get the first three items done on the MATE install so I went ahead and kept that SD card and started fresh on a new one.
One of the beauties of a linux system is I can have an infinite number of setups and just choose the appropriate SD card (or burn one from a stored image) and be up and running again in minutes no matter how badly I screw something up.
VNC and auto start
Three things made me abandon the MATE setup.
1) Ultimately I wasn’t going to need or use it,
2) Getting VNC to start on bootup was a pain and if I wanted to have this Pi in a different location I needed that,
3) Shaw’s modem was causing me conniption fits and I had to do a reinstall anyway. More on that later.
I tried two or three VNC clients and they all worked in some way, but I could get none of them to start up when the computer booted. Issues like this are the reason why an OS like linux is not for everyone. On Windows or OSX it either works or it doesn’t. On Linux, it should. Maybe. If you can figure out the right way to approach the problem. Using commands you have no hope of understanding. Cue swearing.
I ended up using tightvnc but never really got a reliable boot up going before I moved on to different problems.
A Shaw Rant
This is a bit out of order. I did install NGINX and get it running. But in order for it to work properly, I needed to forward the traffic from outside the modem to the IP of the Pi — which I had set at 192.168.1.4. Unfortunately when I first booted my Pi it had grabbed an arbitrary temporary IP of 192.168.150 which I new I was going to change. So later when I reassigned the Pi with the permanent .4 IP the $%^#& Shaw BlueCurve modem/router/wifi box refused to believe me. And since port forwarding was done not by IP, but by machine name, I needed it to reflect reality rather than its own personal prejudices. No matter how many times I set it up, rebooted things, renamed them and/or re-installed from scratch, it kept forwarding to the .150 address. Which. Didn’t. Work.
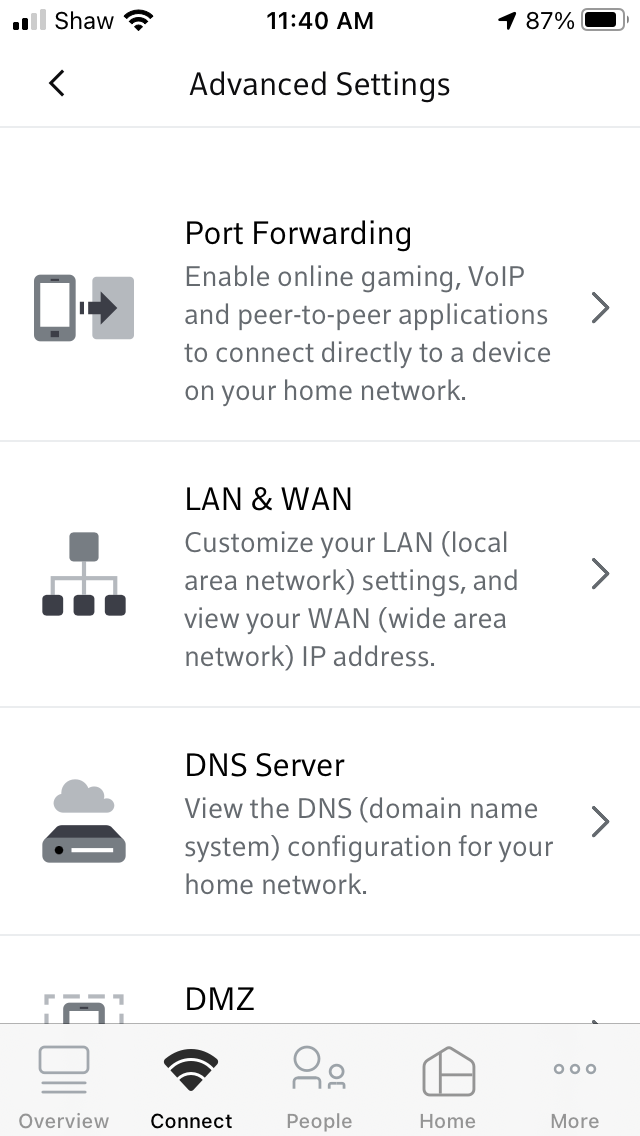

Eventually, after days of frustration, I waited until everyone had left the house and had to do a factory reset of the modem and then set it all back up again before it would forget that original “temporary” assignment. This time it grabbed the actual IP (which by this time was the Ubuntu server install with a different IP of 192.168.1.3) and I could forward traffic to the appropriate computer. Honest to god I have no idea why something so simple has to be so hard. This is the second time the asinine setup of the BlueCurve modem has caused me days of grief. Last time I broke the modem so bad they had to replace it. If I had the spare cash I would be tempted to just turn the Shaw modem into a plain modem and install my own router (like I used have using my old Apple router which sadly stopped working) so I could control my own network without having to resort to Shaw’s idiotic external website or an extra app to do something so basic (at least basic for a router, which after all is supposed to …well… route). But that of course comes with its own set of problems and probably would mean breaking it all over again.
Images
The last thing I wanted to touch on was disk images. After I got the Ubuntu MATE setup the way I wanted it and before I abandoned it, I popped the 32 gig SD card back in my Mac. After a lot of trial and error — and googling — I figure out if I used Terminal to run this command: sudo dd bs=1m if=/dev/rdisk2 of=/Users/admin/Desktop/piMATE.img then 379 seconds later ( around 6 and a half minutes) I would have a fully functional image of the disk on my desktop. At this point I could then use that image to burn the setup to another drive, including the 500gb harddrive I wanted to use instead of the SD card, or another SD card. It worked flawlessly. This the coolest part of the whole experiment.
dd speed
The dd command was a bit finicky. The first time I ran it I didn’t set the block size (bs=1m) and I didn’t use the rdisk command.
sudo if=/dev/disk2 of=/Users/admin/Desktop/pitest.img
As a result it took 8783 seconds (146+ minutes or 2.5 hours) to make the same 32gig image. As it is, when I did an image of the 500gig drive with the correct commands it still took 5461 seconds (1.5 hours). And I need to find drive with a spare 500gig to store the image on. My current project is to try and figure out how to shrink an image, as I know that the actual drive barely has 20gig of data on it —the rest is just blank space. Always something…
Ubuntu Server & Concluding…
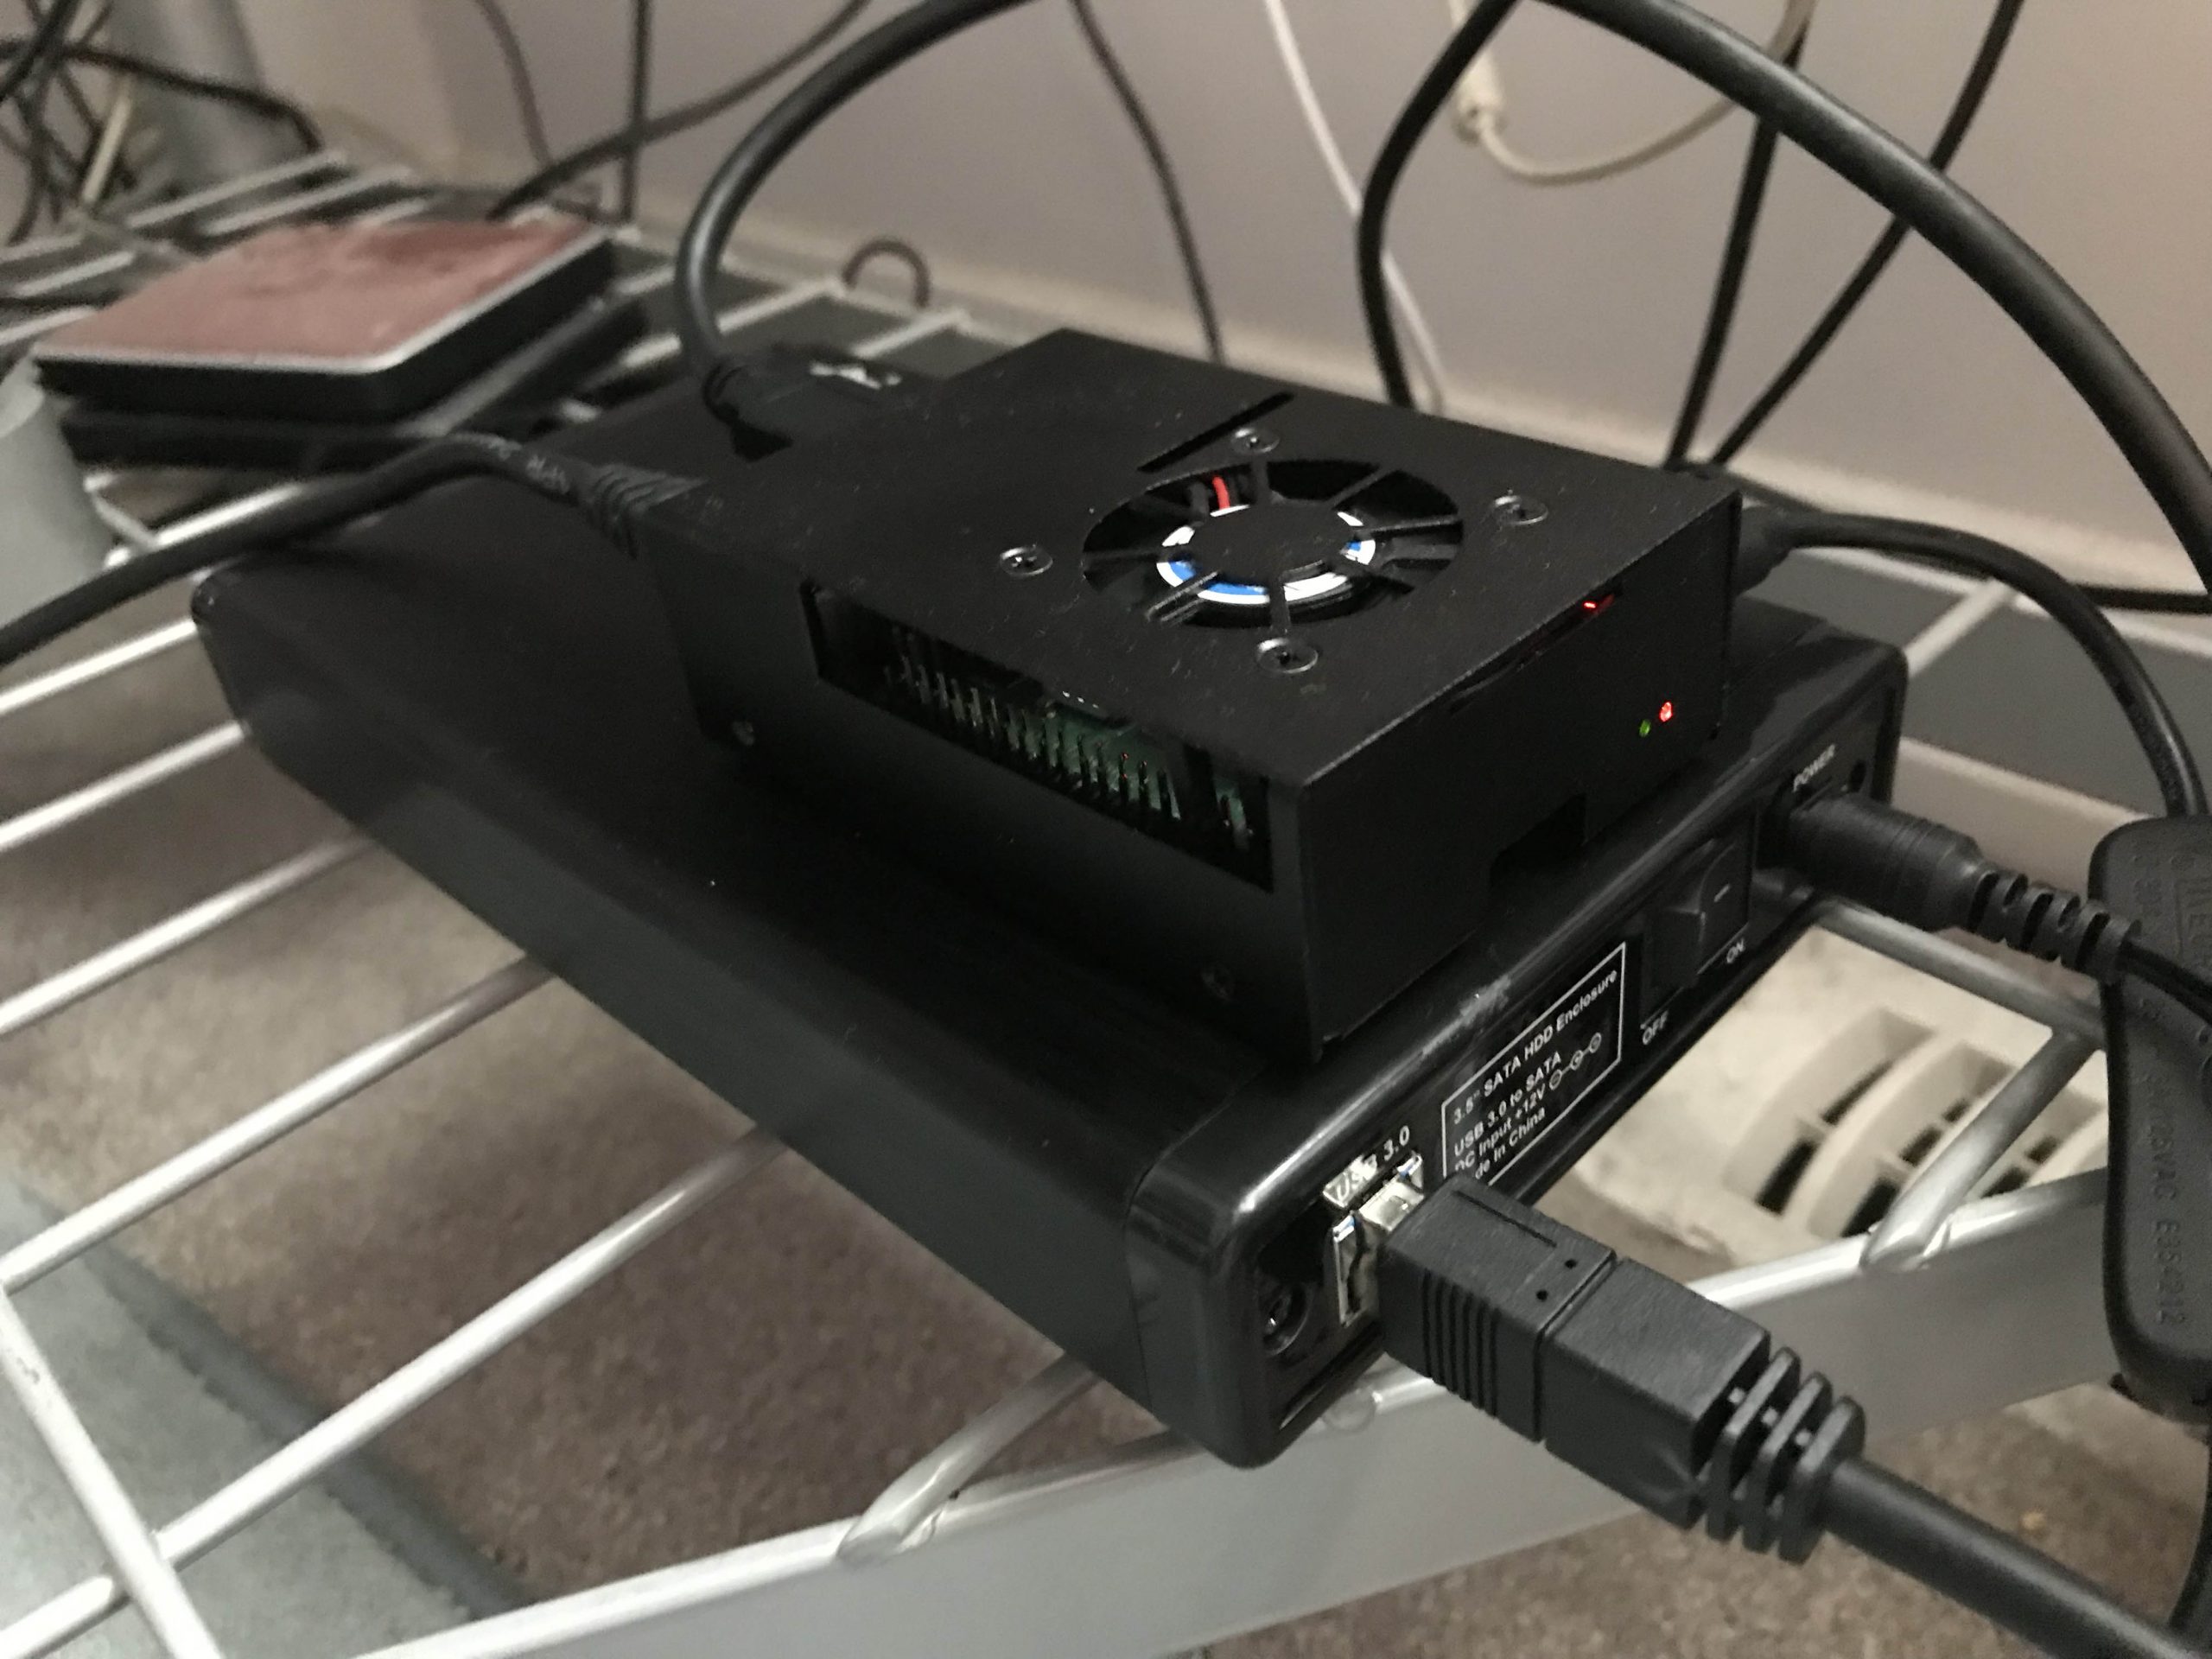
Below is my new toy with hard drive. As stated, I eventually installed Ubuntu server which has to be done completely by the command line interface, but by this time I was pretty comfortable with that. Everything else went pretty smoothly after so many fits and starts, and it now does everything I want it to including managing the internal web routes, serving two web development sites with php and mysql, and being used as an extra file server.
And, sadly, I delivered my old black PC to the computer recyclers. RIP old fellow.