Pi Day
I made Pi
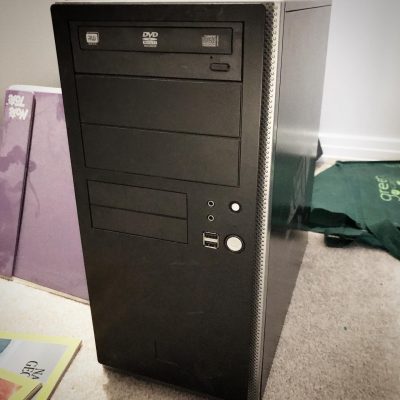
A couple of power failures too many and my old PC which I had converted to a linux box was starting to wear. I had installed NGINX Proxy Manager on it and a) it was a bit slow and b) wasn’t coming back up after power failures. And since I had routed most of my internal web access through it it was… well… annoying.
What made it worse was after a power failure I had to haul the old black box upstairs, plug it into my monitor and keyboard and reboot it it to get past a bunch of warnings. Then haul it back downstairs and reboot it again. The last straw was the third time when the hard drive showed an error that I couldn’t fix from the prompt.
Talking myself into it.
I had been sniffing around Raspberry Pi’s for a bit now. For those who don’t know, Raspberry Pi’s are a single-board hobby computer that are dirt cheap. The latest iteration, the Pi 4b came with 8 gig of RAM which was 6 gig more than my old box had.
Specs
- 8 gig Ram
- USB 2 (2) and 3 (2)
- 2 HDMI ports
- gigabit ethernet
- Quad core ARM 64-bit processor @ 1.5GHz
- 2.4 GHz and 5.0 GHz IEEE 802.11ac wireless,
- Bluetooth 5.0
- Micro-SD card slot for operating system and data storage
The old Linux box, on the other hand, had 2 cores, 2 gig of ram, no HDMI, no wifi, no USB 3, 10mb ethernet, and no bluetooth. The only saving grace it had was it had payed for itself many times over.
Costs
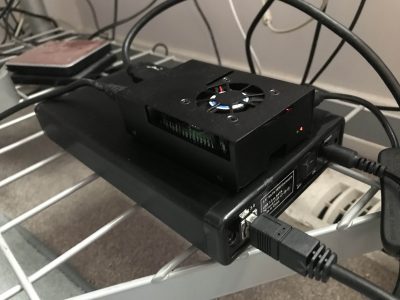
A Pi though, was just a plain board; so in addition to the cost of the unit I would need some new cables, a case and a power supply. I found a combo deal for the extras and made a trip to Memory Express to pick it all up.
$112.99 Pi 4b 8gb ram
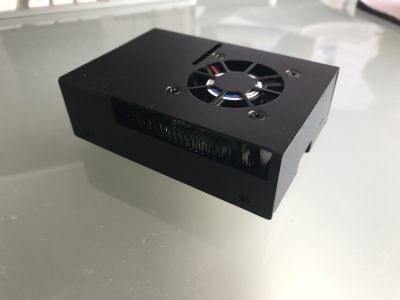
$24.99 Case/fan/power supply/heatsinks kit
and
$14.99 hdmi -> hdmi mini cable
$24.99 external case for my old 500gb drive
Total: $186.86 including tax
A steal! Of course I also need 16+ gig micro sd card (~$20) but thankfully I had a couple of 32s already. I also discovered I only had one usb keyboard (all my old PC keyboards were ps2) — so that was a pain having to swap back and forth. But after it was setup I wasn’t going to need one so I just toughed it out.
What OS?
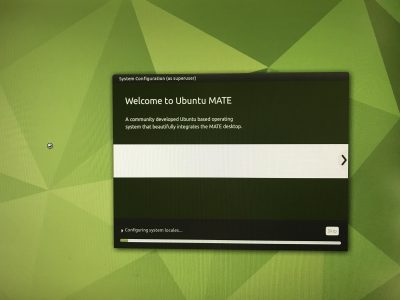
I hemmed and hawed about what to install. Since this was a machine for learning and using linux I wanted as close to a vanilla experience as possible. In the end I settled on Ubuntu Mate as it was pretty close to what I had used on my old machine (Mint Mate). Most people go with a Raspbian OS install which is the default but it is Debian based and I wanted to stick with Ubuntu. ubuntu-mate.org/raspberry-pi/install/
I also wanted to be able to boot off an external USB drive so I had to “flash the eeprom” … essential write some permanent code to the chip so it would recognize the external drive as a bootable one. The only really scary part of the process but it worked just like the install instructions said it would.
Once again in English
Linux is an operating system. A distro (i.e. Ubuntu, Debian, Mint etc.) is a variety each of which may have made different choices in its history about which components to use to accomplish certain tasks. Sort of like a carburetor vs fuel injection on cars. A flavour (i.e. Mate, KDE, XFCE) is essentially just the desktop environment and apps; it may have different options installed and choose different base applications like word processors or web browsers. Think the SE model of your car vs. the LE model.
In most cases you can mix and match a lot of the options and customize your setup as much as you want because they are all based on the same core operating system.
In the end
To skip ahead, I did get a good install of Ubuntu Mate up and running — although once again getting the VNC client to run automatically chewed up hours. But in the end I changed my mind and went with a Ubuntu Server install which has no GUI or desktop (thus “wasting” all the time spent on getting the VNC to work). I figured it would be cleaner and I might as well learn to rely on the command line interface. ubuntu.com/tutorials/how-to-install-ubuntu-on-your-raspberry-pi I did keep the working install of Mate on my other sd card so I can go back to that when I have time and energy.
Also, for next time, I could have saved myself the $15 for the hdmi adapter cable as I have now figured out how to do the install remotely without using a monitor at all. Of course I needed the cable to see what it was I was doing as I learned how to do it without seeing it. So I guess I needed it after all. But next time…

Problems? What problems?
I have to say that the initial install went so very, very smoothly. I had a computer up and running in a couple of hours with zero issues. Of course, it wasn’t the computer I wanted and that’s where it started to go sideways. Most of it was operator error and I learned a lot (more on that in future posts) but one thing sticks out as a stupid error.
I had picked up the cheapest external case I could find to use the old 500gig drive on the Pi. The intention was to make it a boot drive and eschew the sd card entirely. But as I mentioned the drive was now showing errors and I had files I wanted to retrieve. I had intended to boot the old box from the drive after I moved it in to the case and drive and troubleshoot the drive using my Mac. But it was a USB 3 case with no backward compatibility. And the old black box only had USB 2 so it now couldn’t see the drive. Deja vu back to the original install Sigh.
No problem. I had borrowed one of my other external cases (from my backup drive) when I did the initial install way back when, so I could just swap cases. The problem arose when I broke something in the swap. The older case was not meant as a replacement unit and had tighter tolerances. By the time I had swapped drives for the 4th time it no longer powered up the drive…I must have bent something not meant to be bent. F*ck. So the new case went to my 2TB backup drive and back to my desk and I need to go get a new case.
At the end of the day (actually I think this was day 3) I decided I could forgo retrieving anything off the 500gb drive and, after I got a new case, I just reformatted the drive and started from scratch. Hopefully I didn’t forget to backup anything important but que sera, sera. I also realized much too late that of course I could have continued to run the Pi off the sd card and accessed the old drive in the original case I bought for whatever troubleshooting needed to be done. Sigh again.
My best moment in the whole process though, was when after I was up and running and happy with everything, I made an image of my sd card onto my Macbook. And then I plugged in the external, wrote the image to the disk, plugged it into the Pi and — omfg — the thing Just Worked.
In conclusion
So. I now have a fully functional computer about the size of a pack of cards that will do pretty much everything a light-weight computer user would want. The Pi’s have no graphics card per se so games are not really in the cards and they say it can struggle with high quality YouTube at times but that’s not really important for most people. On the other hand it can run two monitors right out of the box.
Linux has open source options for pretty much everything from an office suite to image editing that are compatible with most standards and can run most of the popular web browsers like Firefox and Chrome. So for <$200 (providing you have a monitor, mouse and keyboard) you can have a pretty damn fast computer that won’t be so different from a Windows machine or a Mac.
I have a lot more to say about the install but I think it will be a separate step-by-step-ish post. Suffice it to say after about 3 or four days of installing, googling and reinstalling I have a setup I like and can backup/restore easily. So it’s time to let the breaking commence!