Sourdough for idiots like me
I’ve been reluctant to write this down and post it because it’s a) over-explained on the interwebs, and b) so very, very subjective. Remember that term. The best advice you will get is to wing it and see what happens. Go Bob Ross on that thing and see if you have any “happy accidents.” But here it goes…

Caveats
Truth is most “experts” you will come across are bread snobs—just like coffee snobs, audiophiles etc. etc. ad nauseum. I’m not. I like truckstop coffee, AM radio and warm, fresh bread. Good is almost always good enough. They’re not wrong but take any maxims with a literal grain of salt. Sourdough seems to be the epitome of bread-baking snobbery: dense vs airy, crust texture, good crumb/bad crumb, the internet is full of “subject matter experts” pontificating on what makes the best sourdough. But the truth is bread is bread, and it’s pretty darn easy to make a decent loaf. Under-baked is bad, but it’s hard to over-bake. Under-kneaded is bad, but it’s hard to over-knead. Under-salted is bad, but…well actually it is bad to over-salt. Don’t over-salt.
Sourdough is super easy. It just takes a bit of time to make.
Sourdough for the Regular Person
There are (to me) two basic techniques and two basic cooking methods. I use both and frankly I see very little difference in the final product (see the snob comments above 🙂 ). There are a lot of things you can do to address the “sourness” of the final loaf and I will mention a few later. But if your aim is to produce a good tasting loaf of bread without using commercial yeast, sourdough is well within most home bakers’ means.
Sources
I use several recipes that I have modified from a few sources. I prefer videos, as a lot of it is technique and developing texture and the visuals help build confidence you are on the right track. But be your own baker…
Bake with Jack videos: Beginners Sourdough I love Jack. He’s fun, encouraging and realistic about bread.
His recipe calls for folding not kneading and uses a stone in the oven. Be sure to check out his timing video as well to help build a good model for making the whole, lengthy process more manageable.
Cooking with Alex: A Non-Baker’s Guide To Making Sourdough Bread Alex is an experimenter and strives to simplify. His recipe uses kneading and a dutch oven.
Finally I found this video that has a woman producing a loaf in just one day which I have used to great success. I don’t use her recipe but the timing works well for me.

Starter
Just go ahead and make a starter. It’s easy. Lots of videos, web pages etc, etc. Try this method that is from a study into just what the heck sourdough wild yeast really is (spoiler alert: we don’t really know).
I made mine a couple of years ago. I used white flour, and tap water and have had no issues—it took about 5 days. But feel free to follow all the hints you will find online about distilled water or other flours.
My Hints
- They encourage you to throw away half the starter in order to provide a better culture-to-food ratio (flour [starch] is food to the yeast). It’s not necessary but does help to get more food to the hungry yeast without filling gallon jars with fermenting starter.
- If it starts to smell like “nail polish” it just means it is hungry. Feed it more. Don’t throw it out. If it develops a bit of liquid on top, it is hungry. Feed it more. Don’t throw it out. If it doesn’t rise as fast as it used to, it is hungry, throw out half and feed it more. Don’t start over.
- I feed my starter with rye flour now. White still works when I run out but the rye does provide a bit more “sourness.”
- I keep about 4 or 5 tablespoons in a jar in a fridge. I feed it once a week with a heaping tablespoon or so of flour and equal amounts of water—discarding some first. If I know I am going to bake that week I will add 50 gms of flour and 50 gms of water (a half cup-ish total) and let it sit on the counter for a while (until it starts to double) before returning it to the fridge.
- Use an elastic on the jar to see how much it rises after you feed it in preparation to using.
- Starter can be high hydration and jiggly or low hydration and putty-like. As far as I can tell it doesn’t matter.
- Every month or so, if I haven’t been baking, I will pull it out of the fridge and feed it every day for a few days before discarding a bunch and returning it to the fridge. Does it help? I have no idea; but it reassures me the starter is still rarin’ to go.

The Process
Before we get to the recipe itself let’s talk about the process and the various options. Again, as far as I can tell, no one method works substantially better than another. If you watch the Jack’s timing video above, you will hear him talk about adapting the method to your lifestyle not vice versa. Just make it work for you. The only time I have ever made a “bad” loaf (according to my admittedly low standards) was when I forgot the salt. Don’t forget the salt.
Prepare the starter: I usually (but not always) take it out the night before and feed it so that I have around 100-200 gms of usable starter with a 5 tbsps or so left over. Or… if you are making an overnight loaf, it is more than adequate to feed it in the morning and starting the loaf a few hours later. Or… just use it straight from the fridge—I would suggest you would do this only if you have more than just the scrapings in the jar. But give it a try even if you do.
This part can be referred to as making the levain.
Hint: mark the starting level of the starter and then time how long it takes to double. That will give you a rough idea how long you will need to proof a one-day sourdough and a measure of how vigorous your starter is.
Mix: Mix the prepared starter (levain) with flour and water and salt. I usually mix the starter with water and then add flour and salt—purely because it’s easier. Salt killing yeast is a myth—look it up. Then I usually let it rest for 15–30 minutes or so—up to an hour.
Or just use starter straight from the fridge. That works too…it might take a bit more time that’s all.

Knead: I knead for 8-10 minutes. Sure there are lots of tests, but 8 minutes by the clock almost always does the trick. Eventually you will get to know the dough. Which will then change as you screw with flour or hydration. 8 minutes works for me.
Proof for 4 hours (I have a bread setting on my oven that can be used to speed that up).
OR
Stretch and Fold: Instead of kneading just fold the dough. Give it a nice long stretch and then fold it over on itself. If you fold a lot each time the crumb will be closer (more dense); if you fold less it will be airier. Theoretically.
Fold 1—stretch, fold the dough in half—turn 90° and repeat. 12 times or so. Rest 2 hours.
Fold 2—stretch, fold the dough in half—turn 90° and repeat. 6 times or so. Rest 2 hours.
Fold 3—stretch, fold the dough in half—turn 90° and repeat. 6 times or so. Rest 1 hour.
This is varies slightly for the same-day sourdough—mostly more folds. See the end of this post for the timing on that.
Hints: have a bowl of water handy to wet your hands before each fold—it makes it easier. The dough will become less sticky with each set of folds.

Preshape: Put the dough (seam side up if you have been paying attention, which apparently you should. I usually forget.) on a lightly (lightly!) floured surface. Fold the four corners across the center, roll it over and pull it towards you in several directions to try and form a ball with a little surface tension. It’s all about the surface tension.
Rest for an hour covered with a cloth.
Note: if you are making two small loaves (as I usually do), divide the dough before the pre-shape.
Final Shape: the final shaping’s aim is to create a tight structure without degassing the dough too much. Dust the top of the dough with a bit of flour and roll it over. Fold the four corners over—it is like folding an envelope.
- If making a boule, roll it back over and pull it into a ball gently to try and create more surface tension.
- If making a loaf roll the seam down and pull towards you into a sausage shape.
Final Rest: You have tons of choices here. Bannetons are a thing—look them up. Supposedly they help wick moisture away from the dough and prevent sticking while providing shape. I use bowls. Floured cloths are also a thing to prevent sticking—they say rice flour is best, but who has that. I’ve started just lining two identical bowls with parchment paper and a bit of flour—works like a charm.
If you are attempting same-day sourdough, put the shaped dough in a bowl or container lined with parchment, seam side down and cover with a cloth. Proof for 1.5–2 hours or until it has doubled (although who can really judge what doubling is…seriously…?).
If you are proofing overnight, place in a lined container (parchment or a very, very floured cloth) seam side up. I use a square casserole for two loaves separated by a fold of cloth/parchment. Cover with a cloth and throw in the fridge overnight 12-20 hours.
The point of proofing overnight is manifold:
- it gives the (slower) sourdough yeast more time to produce gasses and rise
- it (supposedly) allows gluten to develop more
- it (allegedly) allows the flavours to become more intense.
Baking
Remember to take the dough out of the fridge 2 hours or so before you bake it.

Dig those wrinkles from the parchment.
When preheating the oven, regardless of the method, the longer the better. You want to get as much heat into the stone/dutch oven as possible. I usually do it for 45 minutes to an hour. But 30 minutes still works.
Method 1: preheat the oven with a pizza stone to 425°. Boil some water in the kettle.
Method 2: preheat oven with a dutch oven in it to 450°. My mom uses a pyrex casserole so don’t sweat the dutch oven. I use a cheap Lodge cast iron one on the boat . Mainly you want to contain the moisture — the rest is just heat retention.

If you are doing a same-day sourdough you will transfer the parchment paper directly onto the cooking surface. Easy-peasy. If you proofed overnight you will want to turn proofing container upside down onto a floured peel of some sort (I often use the back of a plate). If you are like me, you then have to gently peel the parchment/cloth away from the dough because it never actually comes away easily despite what the professionals say.
Slice the top of the dough: this allows the dough to continue to rise in the oven and controls where the inevitable split happens. There are all sorts of rules and techniques—look them up. I mostly just put a healthy slash into the dough: minimum half inch deep and usually the whole width of the loaf. I do this before I put it on the pizza stone or after I put it into the hot dutch oven.
Method 1: slide/place the dough on the pizza stone. Pour the boiled water into a cake tin or other container and quickly shut the door. It’s all about the steam baby!
Method 2: take the pre-heated container out of the oven. If you are same-day dough’n it, the drop the parchment directly in. Otherwise flop it from the peel/plate into the hot container. Remember, it’s hot! Seriously…hot. I almost always give it an extra spritz of water to add a bit more moisture, but the internet assures me this is not necessary and definitely not canon. Put the cover back on (with oven mitts!) and put into the oven. Turn the oven temp down to 425°
After 20 or so minutes remove the lid to allow the top to brown.
Method 1: Cooking time is around 30–40 minutes.
Method 2: 20–25 minutes with the lid on, 20–25 minutes wth the lid off.
It’s done: when a) the top is browned to your preference (seriously, go ahead and increase the temp and push it—that dark, dark brown thick crust is a neat texture) or when it is hollow sounding when you thump it on the bottom. I almost always just follow the clock and split the difference: 35 minutes for method 1 / 45 minutes for method 2.
Let cool: “they” say that you need to let it cool completely but that is bollocks. Who needs to trade supposedly increased flavour for warm, melted butter goodness? But the bread does continue to cook after you remove it from the oven so allow 15–20 minutes to cool if you can resist the temptation. Sometimes I just can’t.

The Recipes
I flop back and forth between the two recipes (which really are essentially the same). I finally bought a scale because it really is easier to be more consistent — but just keep track of the amount of flour it takes to make the dough tacky but not too sticky and you are good to go. When scaling I usually stick to Jack’s recipe. Regardless, I generally divide the dough into two small loaves, perfect for two people, one meal each. An uncut loaf keeps pretty well for a few days.
Alex the French Guy
- 1 part sourdough | (200 gm)
- 2 part water | (400 gm) 400ml | 1 3/4 cups
- 3 part flour | (600 gm) | 4 cups
- 12 gm salt|1.5 tsp | (2 gm per 100 gm of flour)
Jack the British Guy
- leaven: 50gm rye + 50 gm water (100 gms)
- 310 gm water
- 450gm flour (usually white)
- 1 tsp salt and a bit
Tips and Tricks?

I forgot and left the convection on—still tasted good though.
- Seriously, you can’t “ruin” bread unless it’s raw. Even if you burn it, it’s still not inedible—sometimes it even tastes better.
- Play with hydration and moisture. Higher hydration can be a pain but it does change the texture.
- Want flavour? Rye and whole wheat flours tend to be more “sour.” Longer proofing in the fridge will build both gluten and flavour. Starving your starter a bit before you use it apparently adds favour. “They” say a less hydrated starter also increases sourness. Your mileage will vary.
- Parchment really is a convenient way to line containers. Strictly non-traditional, but who cares?
- Get a dough scraper. It helps with wetter doughs and really helps clean up. I spritz the crusty counter with water and then scrape it up into a paper towel. A quick wipe and you are done.
- Come up with a schedule that works for you. Don’t be a slave to the dough!
- Not feeling it? Just make a no knead loaf and save yourself the bother. The starter will wait.
- People take sourdough way too seriously. Don’t be one of those people. 🙂

And finally:
- Make yourself a bullet point recipe—it makes the organizing the day easier:
Day 1
-
- Feed up your starter in the evening
Day 2
-
- Mix your dough, 30 minute rest
- 1st Fold (12 folds), 2 hours rest
- 2nd Fold (6 folds), 2 hours rest
- 3rd Fold (6 folds), 1 hour rest
- Preshape, 1 hour rest
- Final shape, into basket, refrigerate
Day 3
-
- Remove from fridge
- Bake
OR
Same-day sourdough:
-
- 8 am autolyse (a fancy word for mix and rest)
- 9 am mix in salt & starter (kneed until mixed/sticky)
- 9:30 am first fold
- 10:00 am second fold
- 10:30 am third fold
- 11:00 am fourth fold (warm spot or proofing oven)
- 12:00 pm fifth fold
- 1:00 pm sixth fold (take of proofer)
- 1:30 pm pre-shape (and divide first if necessary)
- 1:45 pm final shape
- Final proof 1.5 hr or so
- 2:45 Heat dutch oven 450°
- 3:30 Reduce heat. Bake 20 min, 30 min with cover off

Huh…
One door closes (hopefully). Another opens. Onwards as ever…
Computer Specs
Because I keep forgetting the specs of the various machines kicking around the house whilst shopping for new toys.
Surprisingly my old Linux box isn’t as under powered as I thought. It just needs some RAM 🙂 But then again the 2020 looks on paper to be the weakest link of the bunch so I guess the old way of counting such things is a bit passé.
chipcoresspeedramcacheGeekbench
SingleGeekbench
MultiGeekbench
GPU
| i5 5287U (2015) | 2 | 2.9GHz | 8GB | L3 3MB | 795 | 1463 | 3035 |
| i7 2620M (2011) | 2 | 2.7GHz | 8GB | L3 4MB | 672 | 1455 | ? |
| AMD Athlon X2 7850 (2010) | 2 | 2.8Ghz | 2GB | L2 512k | 375 | 724 | ? |
| i5 4260U (2014) | 2 | 1.4GHz | 4GB | L3 3MB | |||
| i5 5350U (2017) | 2 | 1.8GHz | 8GB | L3 3MB | |||
| i3 1000NG4 (2020) | 2 | 1.1GHz | 8GB | L3 4MB | |||
| i7-8700B (2018) | 6 | 3.2GHz | 16GB | L3 12MB | 1082 | 5483 | n/a |
| ARM BCM2835 (2020) | 4 | 1.5GHz | 8GB | n/a | 225 | 632 | n/a |
| ARM BCM2835 (2020) | 4 | 1.95GHz | 8GB | n/a | 275 | 720 | n/a |
EDIT: I added the Geekbench scores and the real story emerges about my tired old PC. Current fast chips are scoring 1400+ (1600 for the ultra high-end ones) and the best Macs are coming in around 1200 (pre-M1).
EDIT 2: (Nov 30, 2021) I added the Geekbench scores for the Pi (the unit that replaced Blackbox — the AMD Athalon) with both standard and overclocked numbers.
Instagram this past 2 weeks


Ricardo’s Pizza Dough
My go-to pizza recipe these days when I am making pizza in less than 8 hours time. It makes a slightly thicker crust, about 12″ which is perfect for my pizza stone. This supersedes my previous favourite recipe, but frankly there isn’t much difference when you get down to it.
If I have time I generally make the NYC style dough in advance. It works best with at least 24 hrs to ferment in the fridge.
—Taken from ricardocuisine.com. [See my notes/adaptations.]
- 1 cup (250 ml) warm water
- 1 teaspoon (5 ml) instant yeast
- 1 teaspoon (5 ml) sugar
- 2 cups (300 g) all-purpose flour
- 1 teaspoon (5 ml) salt
- In a bowl, combine the water, yeast and sugar. Let stand until the mixture foams on top, about 5 minutes.
- In a food processor, it is important to work with the plastic blade or the dough hook. Combine the flour and salt. Increase the speed to medium and add the yeast mixture until a soft ball forms. [I don’t have a food processor so I add the flour/salt to the liquid and knead by hand: ~ 8 minutes]
- Remove the dough from the bowl and knead for a few minutes on a floured surface to prevent sticking. [Obviously a redundant step for me]
- Place in a lightly oiled bowl and cover with a clean cloth. Let the dough rise for about 30 minutes in warm and draft-free area.
Cut the dough in half.[I make it as one 12–14 pizza.] - Use the pizza dough immediately or refrigerate it (less than 48 hours)[something I never do], otherwise place it in an airtight bag and freeze [I also never do this].


Cracked wheat bread
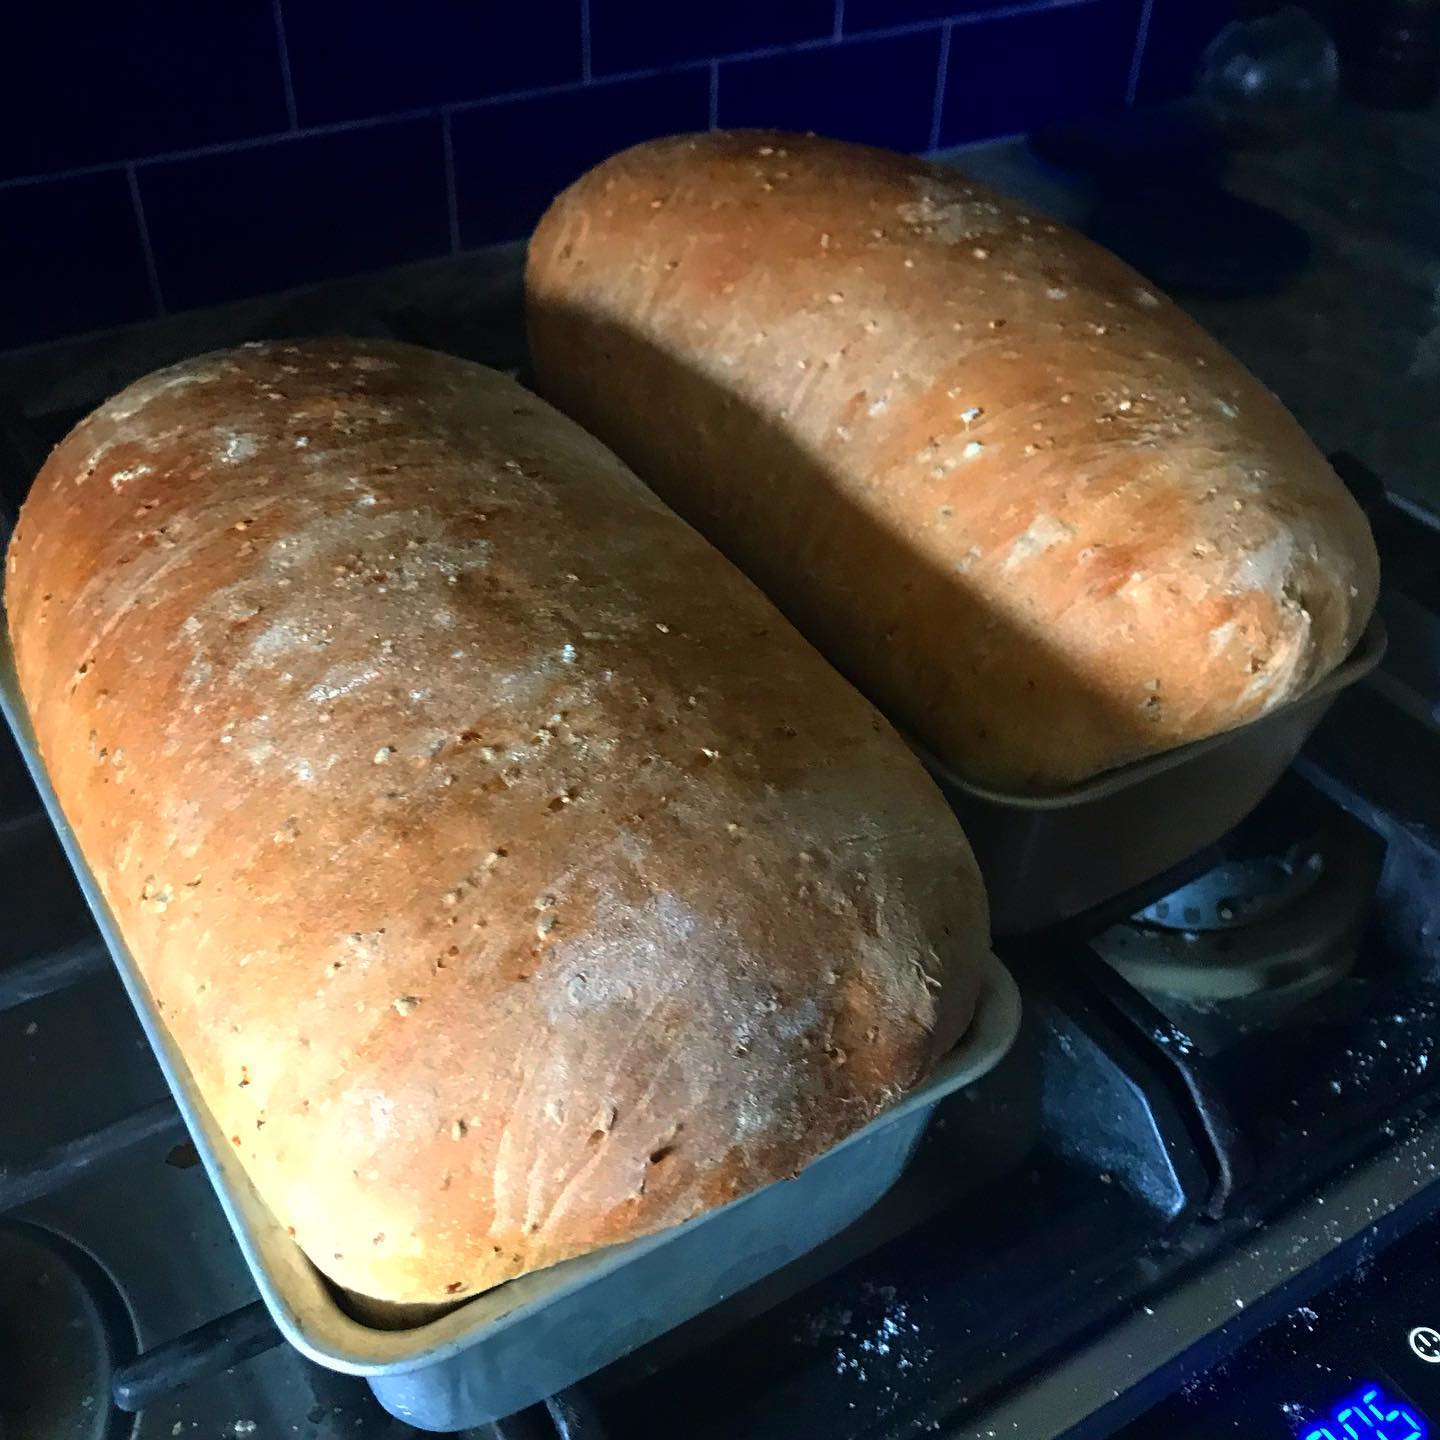
I’m no baker (or chef for that matter) so a lot of the terms like “cook until done,” “knead until ready,” or “let rise until doubled” frankly always baffled and annoyed me. I’ve included them here, but frankly I make this — and most of my bread recipes — strictly by the times. They may vary in your particular environment but once adjusted they should work pretty decently..
- 1/2 cup (80gm) cracked wheat (you can use 7-grain cereal)
- 2 cups (a smidge more actually) (500gm) boiling water
- 2 1/4 tsp (8gm) active dry or instant yeast
- 4 cups (650gm) unbleached all-purpose flour
- 1 Tbsp (10gm) dark brown sugar or honey
- 1 1/2 tsp (15gm) fine salt
- 1 Tbsp neutral cooking oil or regular olive oil
Instructions
- Pour boiling water over cracked wheat, then let stand until mixture cools to ~ 100°F (about 20 minutes).
- Add yeast, 1 cup flour, oil, brown sugar and mix. Add salt. Gradually mix in remaining flour to form a smooth, moist dough. Cover bowl with plastic wrap and let rest 15 minutes.
- Knead until smooth and elastic, adding more flour if it’s really sticky, about 8 minutes.
- Oil a large bowl and add dough to bowl. Cover bowl with plastic wrap and let rise in warm spot until doubled in size, about 1 hour.
- Grease one 9 x 5-inch loaf pan.
- Gently deflate dough by pressing down the dough, then turn out onto lightly floured surface. Stretch out into a rectangle — about 10 x 20 inches. Roll up jelly-roll style, starting with the shortest side, then pinch seams together. Place roll seam-side down into loaf pan.
- Preheat oven to 425°F.
- Cover with a towel and let rise until doubled in size, about 30 minutes.
- Bake in preheated oven until golden and crusty, up to 45 minutes. CHECK LOAF after 20 minutes and cover loosely with a sheet of aluminum foil if it’s already browned enough.
Let cool on rack.
Instagram…


My new Linux install
The hardware
I have had a PC/Windows box sitting by my desk for decades. The latest I bought in 2009. I’ve been a Mac guy since I started in graphic design but never really let go of the Windows system. I played games on PC and used it for the occasional foray into the Windows ecosystem if I needed to use something that wasn’t yet cross-platform. It was setup to use Synergy (a software based KVM) to share my keyboard and mouse and I just flipped the secondary monitor from hdmi to DVI whenever I wanted to use it.
In 2015 it was happily running dual-boot Windows 7 and 8—then I turned it off and left for our sabbatical on the coast. And I never really turned it back on again (aside from one time to retrieve some files)—seems a year of just working (and playing) on my MacBook had finally converted me. And there was Windows 10 to contend with and I wasn’t a fan of the new desktop. Two years later I chanced to fire it up and it just beeped angrily at me and shut down. I was too lazy to track down the issue, so I moved on. Two more years later (about a month ago) I decided to rescue the poor thing and maybe try to set it up as a linux box.

Stats
- AMD 2.8 Ghz 7850 Dual core (2009)
- M3A78-CM Asus motherboard
- 2 GB RAM
- 500 GB sata harddrive
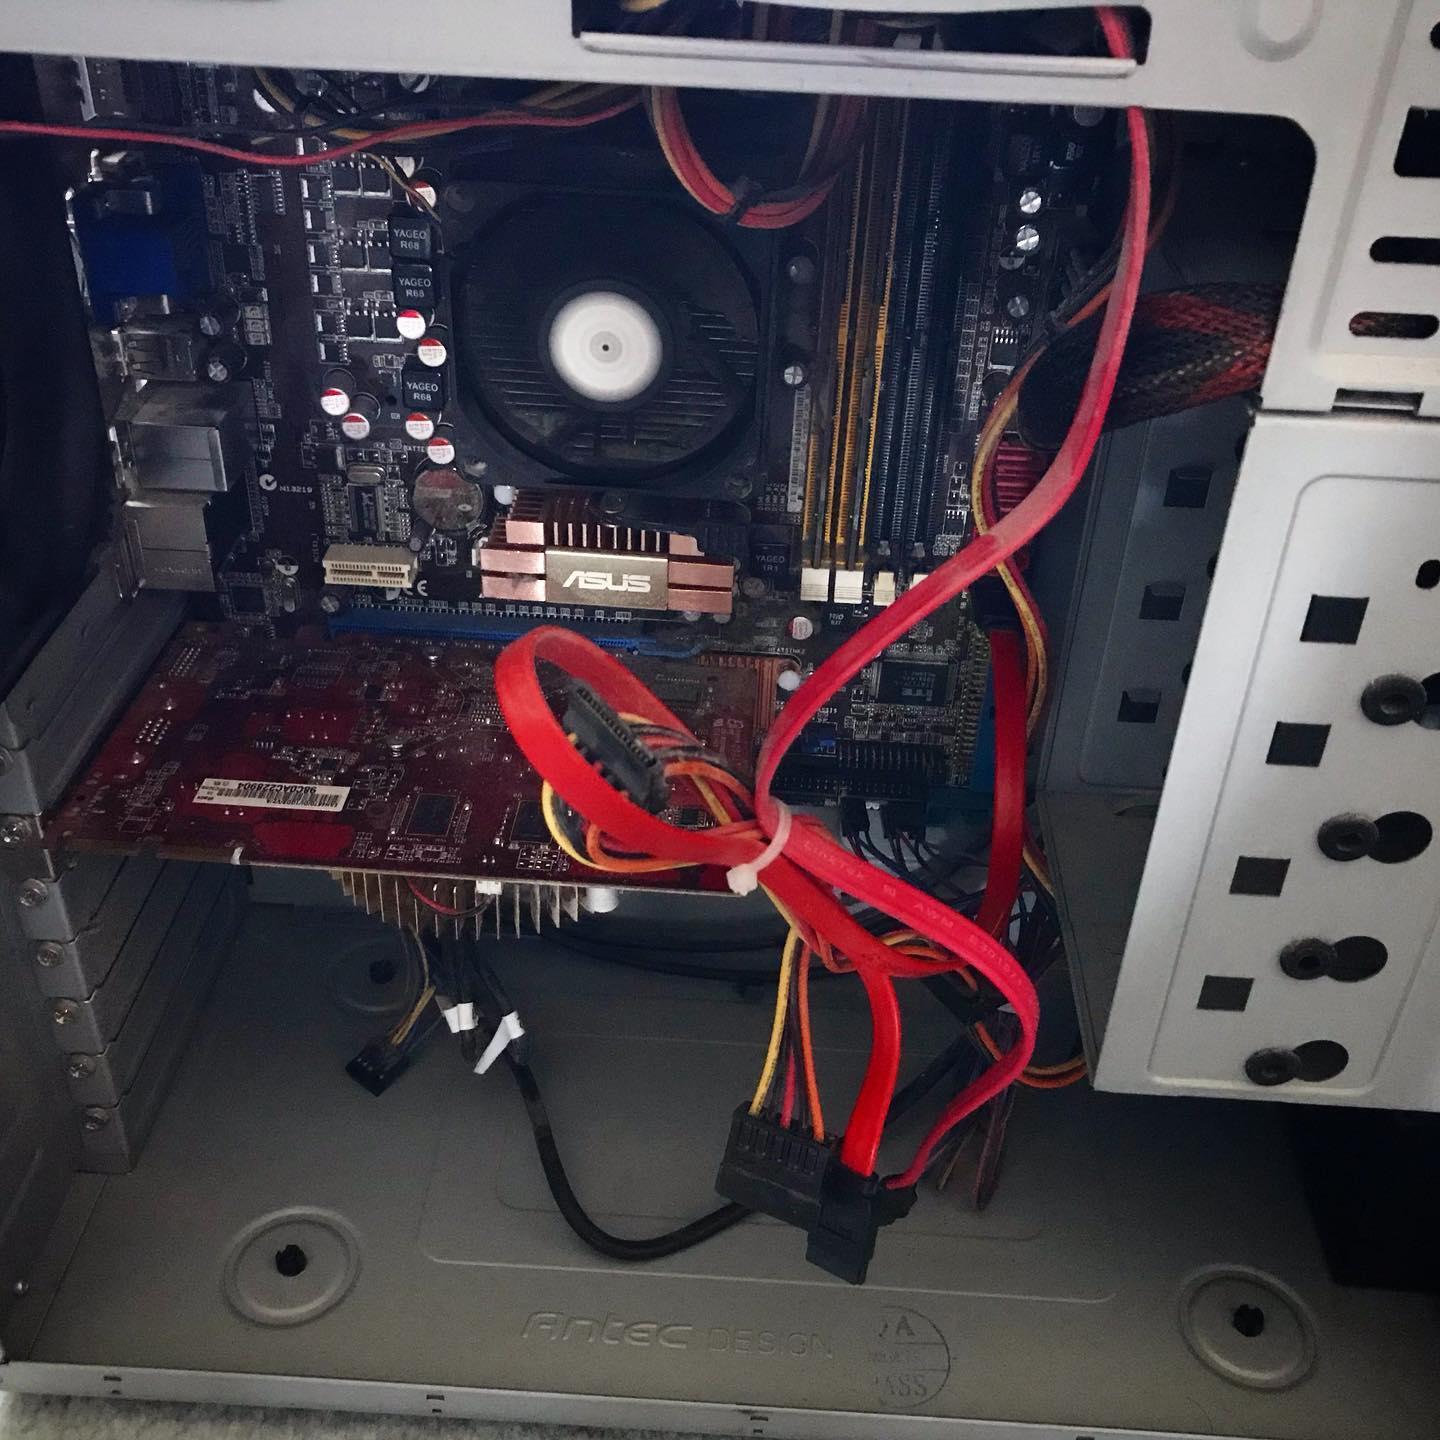
Oh yah, the angry beeps
When I decided to try and resuscitate the poor old thing I took the sides of the case off and saw the processor’s heat sink and fan dangling from its wires. Somewhere along the way the plastic clips that held the heat sink to the processor had come off (broken actually). As soon as I re-secured it, the PC fired right up and booted into Windows. But I was committed to the Linux experiment so I forged on.
Attempt #1
I downloaded the Linux Mint: Cinnamon iso and a utility to flash it to a usb drive on my Mac and proceeded to follow the instructions. My knowledge of boot partitions is shaky since I hadn’t done any playing with installing harddrives since the early 2000s — so I just did what the internet told me to do. Silly me, I know.

Step two was to boot the PC from the flash drive. The theory was I just went into the BIOS, selected the external USB as the primary boot drive and Bob would be my uncle. Unfortunately for me, I was stuck with Uncle Snafu. My BIOS was very old and it took a significant amount of experimentation to even get the USB drives to show up. But I did it and hit restart.
The BIOS splash screen came up. And that’s where the whole thing stopped.
After a bunch more tries, a search on the internet for an updated BIOS (2010) and some scary moments trying to flash the new BIOS. I tried again. And again. And again — this time walking away from the stuck screen for a couple of hours to see if it was just (glacially) slow. Nope. Nope. Nope. It was not going to boot from a USB drive no matter what I did.
I tweaked settings, re-downloaded files, switched USB ports and sticks, tried different hardware configs and did a lot of googling.
After about 2 days of this frustration, I gave in, pulled the harddrive for re-use, mournfully posted a picture of the poor thing on Instagram for posterity and moved the defunct box to the head of the stairs to be sent out for recycling.

And there it sat.
A Glutton for punishment
aka “Attempt #2”
I couldn’t take the failure. I wanted to play with linux and the virtual machine on my mac mini server just wasn’t cutting it. A search online for a Raspberry Pi’s or other such NUCs kept coming back to a ~$200 investment for what was ostensibly just a toy. And there sat that black box, with a perfectly good cpu and harddrive…just mocking me. Stupid motherboard and its decrepit, old BIOS. I tried re-pricing a new motherboard but it quickly became one of those moneypits where you needed to upgrade pretty much everything in turn and the $$ count kept rising.
So I decided to try again. Just once more. Because I really, really hate it when a computer wins.
I hauled it back to my desk, plugged it all in, inserted the USB stick and hit the power button. It booted. I mean it booted all the way to the Linux install menu and then right into the Linux system itself. What the everloving f___? A bunch of head scratching, playing around and experimenting and a lot of muttering later and I figured it out. There was no internal harddrive anymore. Something in the BIOS must have not liked the USB competing with the internal sata system and just hung there. Success? Well even though I had successfully booted the installer, without a harddrive to install it to, I was still stuck.
Or was I?
The games afoot!

Ok. Sata: bad. USB: good. And I had an external USB drive that I used for time machine backups on the mac. Odds were it was just a sata drive in a USB case. I took it apart and yup, just a sata case. Now we were cooking with gas. I swapped out my 2 TB back-up for the 500 GB windows drive and plugged it into the PC. I had to go back into the BIOS a bunch of times to make sure it was going to boot off the USB stick but after that, it all fired up smoothly and I could see the “external” 500 GB drive right there on the desktop. I WIN! Take that computer!
Merrily I followed the instructions and ran the installer. And then I hit a weensie bit of a hiccup. Remember the Windows 7 and 8 installs? Those partitions were right there along with a smaller boot partition. The Mint installer was giving me choice of which partition I wanted to install to. All I had to do was select one. I say this all pretty confidently now but at the time I was mucho confused and my fumbling around pretty much ended up making all the various partitions unusable by the time I was done f@cking around. Tony* would be so proud.

Fast forward at least a day of screwing around that involved grub errors and something called an “invalid arch independent ELF magic error.” Gotta love Linux programmers.
I finally got the drive cleaned off. I stripped it back to the bare bones and got it repartitioned properly with a working boot sector and then did a clean install of Linux Mint and lo and behold: it worked. I had a fresh install of Linux working and connected to the internet and my network.

Remotely interesting,
but too schtupid to be true
The purpose of this refurbished beauty was to sit somewhere out of the way and let me flail away on it. To that end I didn’t want to waste a keyboard/mouse/monitor on it. So I needed to remote in. I got SSH working fine so I could remote in via terminal (i.e. command line stuff like old school DOS commands but unix/linux ones instead) but ran into some snags when setting up VNC (Virtual Network Computing — a way to remote access and control a computer from another computer).
Long story short: x11vnc, which is the recommended vnc server for Linux Mint Cinnamon, which was a recommended install of Linux for beginners had a few issues with headless operation (i.e. no monitor attached). For one, it worked perfectly fine when you booted the computer with a monitor attached but introduced a 3 second delay to every mouse movement or click when you booted it without. As you can imagine this took me a while to discover as all my preliminary setup work was done with a monitor attached. On the other hand, all the other vnc servers I tried didn’t seem to play very nice with Cinnamon. Welcome to the freedom and tyranny of choice — there is a reason most people stick to Mac or Windows OS’s. The issue, after a lot of online searches turned out to be screen compositing (whatever the hell that was) and was a known bug…if I had known to look for it. Unfortunately Cinnamon has compositing baked in and you can’t turn it off like most of the “helpful” websites suggested.
Eventually I came to the conclusion that Cinnamon and I weren’t going to work out. Tragic really. So I tried Xfce, which was a lightweight desktop environment for Mint. Blech. Way too lightweight. Then came MATE, which is a fork of Gnome2, which was a variation of Gnome, which was one of the original linux desktop environments. And it came with a handy switch to turn off compositing. And just like Goldilocks, I found it just right.
In conclusion
I have my old PC up and running. It has three desktop environments to choose from, but I boot straight into MATE. I can access it via terminal or Mac’s built in screensharing. It has been running for 3 days now and hasn’t crashed, locked me out, or reset its compositing (which it was doing for a while after I installed MATE). I have now installed a ton of stuff (see below) and it is humming along (I forgot how loud the fans were) beside me connected only by an ethernet cable.
Ta-da!
I am pretty stoked. I can now move the box downstairs and offload some of my background processes to it and never really worry if I manage to screw it up because it really is a testing server. And Linux has some cool ways to “capture” a system image that you can revert to if you get to cute typing in commands you have idea what their purpose is — which I often do.

VNC and terminal, side-by-side, both looking remotely at the linux box.
Stay tuned.
Software to date
- ssh: to allow secure remote terminal access
- LAMP (Linux, Apache, MySql, PHP):
- Apache is the the webserver
- Mysql the database software
- php is the language to allow webpages to talk to the mysql databases
- Samba: to allow the linux box to share files with Windows and Mac computers
- VSCode: for programming and file editing
- Midori: a lightweight web browser in lieu of Firefox or Chrome
- Mate Tweak: to adjust a few additional settings
- Handbrake: for ripping dvds. I tried a couple and while it works it is very slow so I won;’t like use it for that purpose.
There are tons more things I could add like GIMP and Inkscape, but I don’t intend to use it as a workstation and it is a bit slow for any heavy duty lifting. Mint also has a lot of stuff preinstalled like a firewall, python3, video codecs, Firefox, VLC, ImageMagick, Libre Office and a ton of handy utilities —most of which I won’t use but are nice to have.
* Anthony (Tony) was our IT support person from Avante Garde Technologies back in the day and he made a tidy profit coming in and fixing the things I managed to screw up under the guise of trying to save money and time. Great guy.
No Knead Boule (Bread)

C’s recipe. I generally make a 2/3 batch which is good for two people. I also like to top it with coarse sea salt and Herbes de Provence.
- 3 cups flour
- 1/4 tsp instant yeast
- 1 1/2 tsp salt
- 1 1/2 cups water (room temp or cold)
Put the flour, salt and yeast in a bowl. Add the water. Mix with a wooden spoon until incorporated and dough is shaggy. No need to knead.
Cover with plastic wrap. Let sit for 12 to 21 hours.
Use as-is for pizza dough.
- For a boule, punch down the dough (use flour—it will be sticky), and form it into a ball. Roll the ball in flour. Cover loosely, and let rise until double (1 to 2 hours although you can get away with as little as 30 minutes).
- Put a Dutch oven with a lid in the oven, and heat it to 425°F for a minimum of 30 minutes—longer is better.
- Flop the risen dough into the hot Dutch oven; optionally top with coarse salt and a generous sprinkle of Herbes de Provence. A spritz of water will also make the crust a bit more crispy.
- Cover and bake in oven for 30 min.
- Remove the lid, and bake 15 minutes more.
Enjoy!


NYC Pizza Dough
New York style!
A 12–13” pizza (~63% hydration) that I usually double so I have one in the fridge for later. Perfect for 2 people.
If I have time this is the dough I make. It works best with at least 24 hrs to ferment in the fridge but I have successfully let it sit in the fridge for up to 5 days. If I want pizza last minute then I usually go for Ricardo’s dough recipe.

- 225 gm flour (~1 3/4 cups)
- 1/4 tsp (.8 gm) active dry yeast
- .5 tsp (3 gm) kosher salt
- .5 tsp (2 gm) sugar
- 143 gm lukewarm water (slightly less than 3/4 cup)
- .6 tsp (3 gm) oil (non virgin olive oil)
Mix dry ingredients, then add water & oil.
Mix, then knead ~8 minutes.
Put in sealed, oiled container for a minimum of 24 hours, and up to 5 days.
Warm dough at least 1 hr before using. Preheat oven and pizza stone to 525°F for around an hour.
Form into a ball and flour dough heavily. Flatten into a small (6″) circle. Create edge of crust by pulling the edges into the circle with your fingertips. Continue to spin dough and stretch from the edges in.
Transfer to a piece of parchment paper (or a heavily floured peel). Add sauce (not too much), pepper flakes and preferred ingredients. Top with cheese—you can get away with remarkably little if that is your jam.
Bake until the bottom is done to your particular preference (around 8–12 minutes)

Tasty and Easy Sauce
Open a can of plain tomato sauce and pour into a tupperware container. Add 4 or 5 glugs of extra virgin olive oil. Mince 3 or 4 cloves of garlic and add that in too. Add pepper flakes or dried oregano if you want but it’s not necessary. Store in fridge for a day or two to let it all flavourfy. Lasts for weeks.