Instagram this past 2 weeks


Ricardo’s Pizza Dough
My go-to pizza recipe these days when I am making pizza in less than 8 hours time. It makes a slightly thicker crust, about 12″ which is perfect for my pizza stone. This supersedes my previous favourite recipe, but frankly there isn’t much difference when you get down to it.
If I have time I generally make the NYC style dough in advance. It works best with at least 24 hrs to ferment in the fridge.
—Taken from ricardocuisine.com. [See my notes/adaptations.]
- 1 cup (250 ml) warm water
- 1 teaspoon (5 ml) instant yeast
- 1 teaspoon (5 ml) sugar
- 2 cups (300 g) all-purpose flour
- 1 teaspoon (5 ml) salt
- In a bowl, combine the water, yeast and sugar. Let stand until the mixture foams on top, about 5 minutes.
- In a food processor, it is important to work with the plastic blade or the dough hook. Combine the flour and salt. Increase the speed to medium and add the yeast mixture until a soft ball forms. [I don’t have a food processor so I add the flour/salt to the liquid and knead by hand: ~ 8 minutes]
- Remove the dough from the bowl and knead for a few minutes on a floured surface to prevent sticking. [Obviously a redundant step for me]
- Place in a lightly oiled bowl and cover with a clean cloth. Let the dough rise for about 30 minutes in warm and draft-free area.
Cut the dough in half.[I make it as one 12–14 pizza.] - Use the pizza dough immediately or refrigerate it (less than 48 hours)[something I never do], otherwise place it in an airtight bag and freeze [I also never do this].


Cracked wheat bread
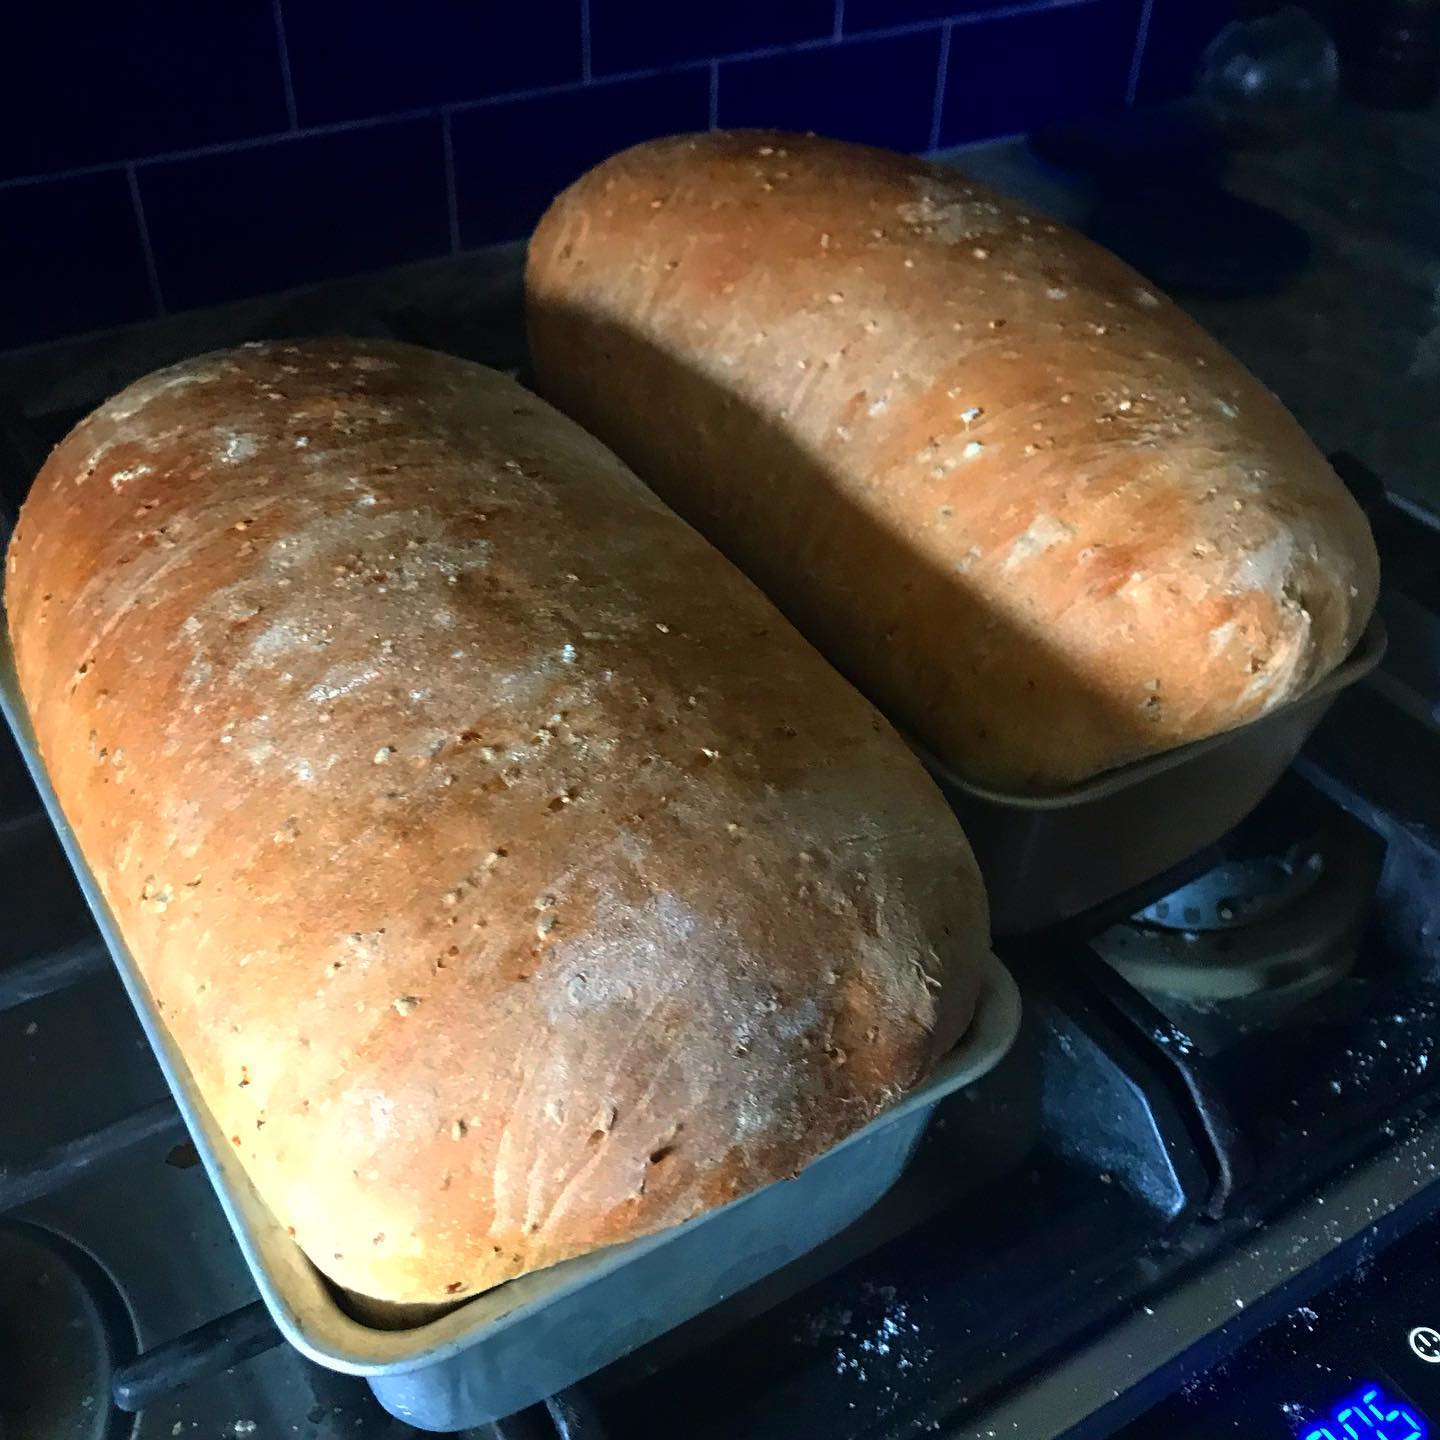
I’m no baker (or chef for that matter) so a lot of the terms like “cook until done,” “knead until ready,” or “let rise until doubled” frankly always baffled and annoyed me. I’ve included them here, but frankly I make this — and most of my bread recipes — strictly by the times. They may vary in your particular environment but once adjusted they should work pretty decently..
- 1/2 cup (80gm) cracked wheat (you can use 7-grain cereal)
- 2 cups (a smidge more actually) (500gm) boiling water
- 2 1/4 tsp (8gm) active dry or instant yeast
- 4 cups (650gm) unbleached all-purpose flour
- 1 Tbsp (10gm) dark brown sugar or honey
- 1 1/2 tsp (15gm) fine salt
- 1 Tbsp neutral cooking oil or regular olive oil
Instructions
- Pour boiling water over cracked wheat, then let stand until mixture cools to ~ 100°F (about 20 minutes).
- Add yeast, 1 cup flour, oil, brown sugar and mix. Add salt. Gradually mix in remaining flour to form a smooth, moist dough. Cover bowl with plastic wrap and let rest 15 minutes.
- Knead until smooth and elastic, adding more flour if it’s really sticky, about 8 minutes.
- Oil a large bowl and add dough to bowl. Cover bowl with plastic wrap and let rise in warm spot until doubled in size, about 1 hour.
- Grease one 9 x 5-inch loaf pan.
- Gently deflate dough by pressing down the dough, then turn out onto lightly floured surface. Stretch out into a rectangle — about 10 x 20 inches. Roll up jelly-roll style, starting with the shortest side, then pinch seams together. Place roll seam-side down into loaf pan.
- Preheat oven to 425°F.
- Cover with a towel and let rise until doubled in size, about 30 minutes.
- Bake in preheated oven until golden and crusty, up to 45 minutes. CHECK LOAF after 20 minutes and cover loosely with a sheet of aluminum foil if it’s already browned enough.
Let cool on rack.
Instagram…


My new Linux install
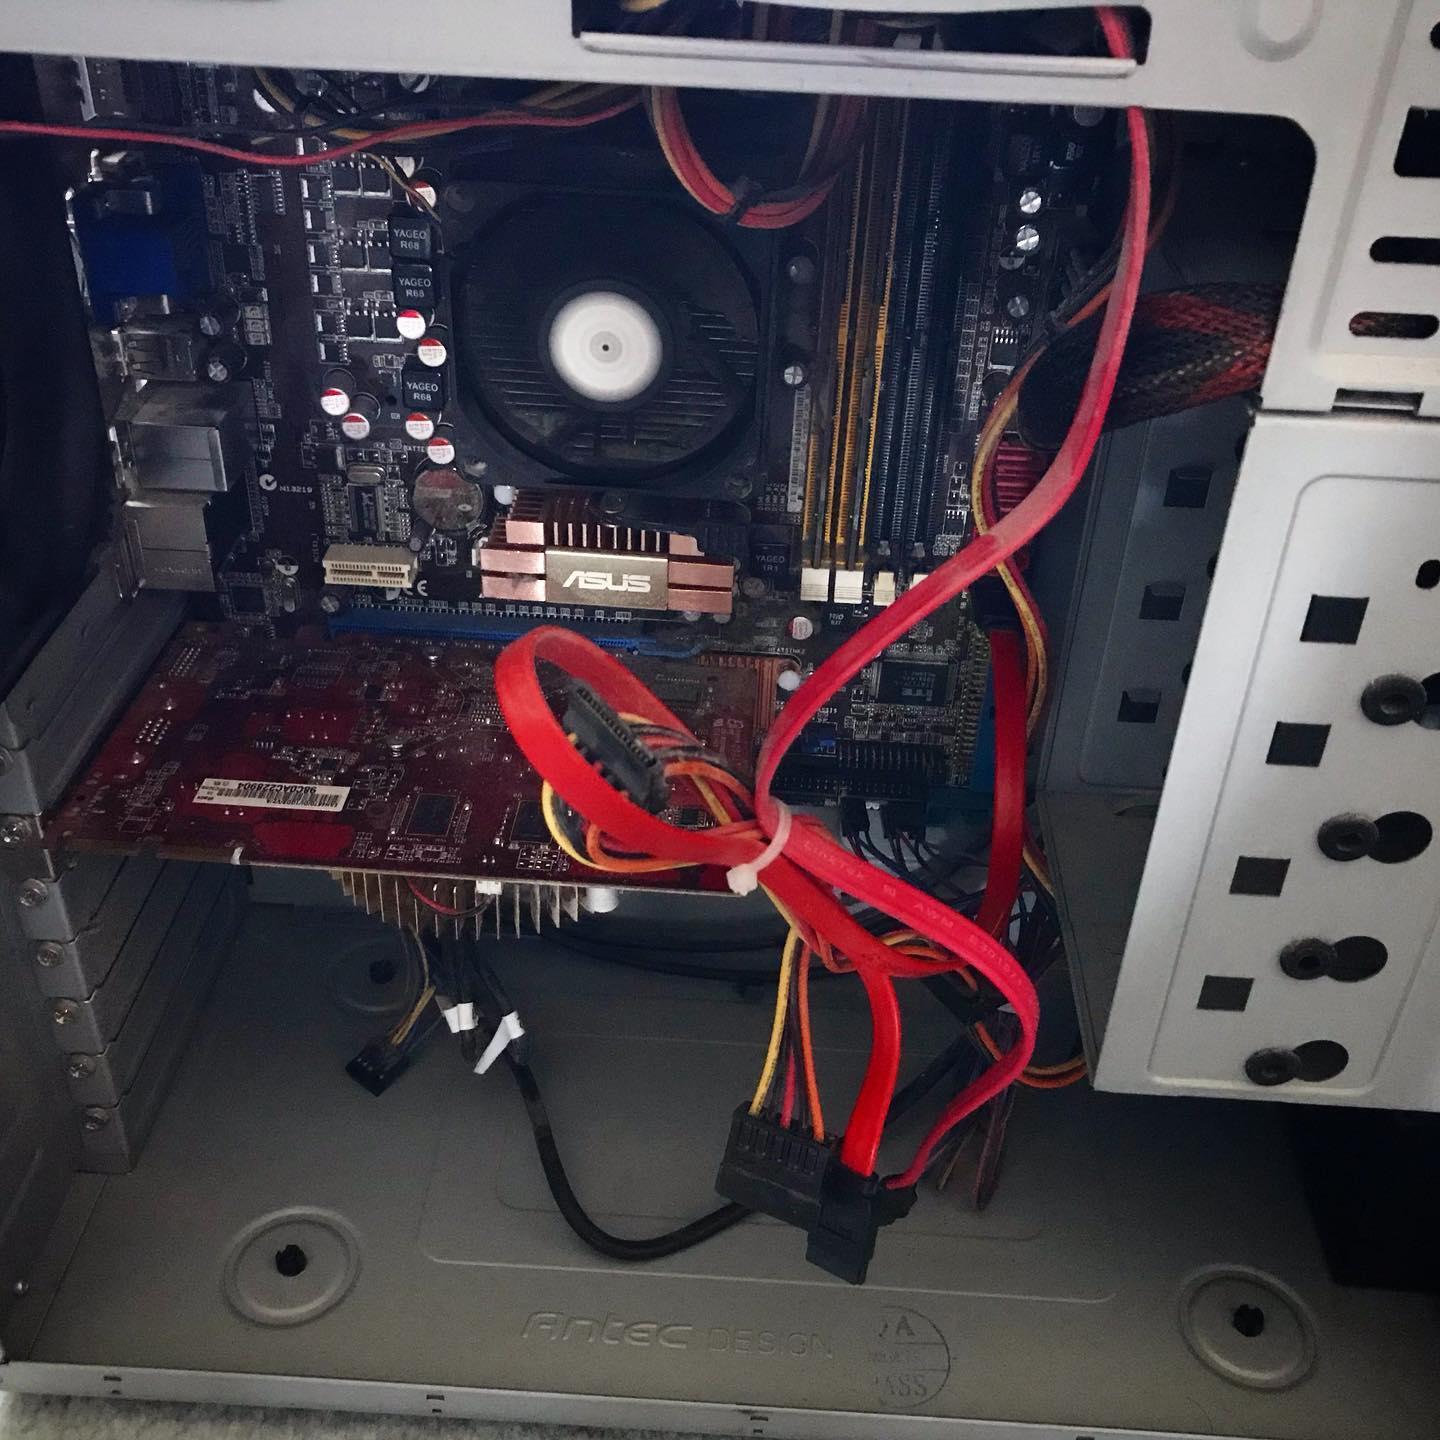
The hardware
I have had a PC/Windows box sitting by my desk for decades. The latest I bought in 2009. I’ve been a Mac guy since I started in graphic design but never really let go of the Windows system. I played games on PC and used it for the occasional foray into the Windows ecosystem if I needed to use something that wasn’t yet cross-platform. It was setup to use Synergy (a software based KVM) to share my keyboard and mouse and I just flipped the secondary monitor from hdmi to DVI whenever I wanted to use it.
In 2015 it was happily running dual-boot Windows 7 and 8—then I turned it off and left for our sabbatical on the coast. And I never really turned it back on again (aside from one time to retrieve some files)—seems a year of just working (and playing) on my MacBook had finally converted me. And there was Windows 10 to contend with and I wasn’t a fan of the new desktop. Two years later I chanced to fire it up and it just beeped angrily at me and shut down. I was too lazy to track down the issue, so I moved on. Two more years later (about a month ago) I decided to rescue the poor thing and maybe try to set it up as a linux box.

Stats
- AMD 2.8 Ghz 7850 Dual core (2009)
- M3A78-CM Asus motherboard
- 2 GB RAM
- 500 GB sata harddrive
Oh yah, the angry beeps
When I decided to try and resuscitate the poor old thing I took the sides of the case off and saw the processor’s heat sink and fan dangling from its wires. Somewhere along the way the plastic clips that held the heat sink to the processor had come off (broken actually). As soon as I re-secured it, the PC fired right up and booted into Windows. But I was committed to the Linux experiment so I forged on.
Attempt #1
I downloaded the Linux Mint: Cinnamon iso and a utility to flash it to a usb drive on my Mac and proceeded to follow the instructions. My knowledge of boot partitions is shaky since I hadn’t done any playing with installing harddrives since the early 2000s — so I just did what the internet told me to do. Silly me, I know.

Step two was to boot the PC from the flash drive. The theory was I just went into the BIOS, selected the external USB as the primary boot drive and Bob would be my uncle. Unfortunately for me, I was stuck with Uncle Snafu. My BIOS was very old and it took a significant amount of experimentation to even get the USB drives to show up. But I did it and hit restart.
The BIOS splash screen came up. And that’s where the whole thing stopped.
After a bunch more tries, a search on the internet for an updated BIOS (2010) and some scary moments trying to flash the new BIOS. I tried again. And again. And again — this time walking away from the stuck screen for a couple of hours to see if it was just (glacially) slow. Nope. Nope. Nope. It was not going to boot from a USB drive no matter what I did.
I tweaked settings, re-downloaded files, switched USB ports and sticks, tried different hardware configs and did a lot of googling.
After about 2 days of this frustration, I gave in, pulled the harddrive for re-use, mournfully posted a picture of the poor thing on Instagram for posterity and moved the defunct box to the head of the stairs to be sent out for recycling.

And there it sat.
A Glutton for punishment
aka “Attempt #2”
I couldn’t take the failure. I wanted to play with linux and the virtual machine on my mac mini server just wasn’t cutting it. A search online for a Raspberry Pi’s or other such NUCs kept coming back to a ~$200 investment for what was ostensibly just a toy. And there sat that black box, with a perfectly good cpu and harddrive…just mocking me. Stupid motherboard and its decrepit, old BIOS. I tried re-pricing a new motherboard but it quickly became one of those moneypits where you needed to upgrade pretty much everything in turn and the $$ count kept rising.
So I decided to try again. Just once more. Because I really, really hate it when a computer wins.
I hauled it back to my desk, plugged it all in, inserted the USB stick and hit the power button. It booted. I mean it booted all the way to the Linux install menu and then right into the Linux system itself. What the everloving f___? A bunch of head scratching, playing around and experimenting and a lot of muttering later and I figured it out. There was no internal harddrive anymore. Something in the BIOS must have not liked the USB competing with the internal sata system and just hung there. Success? Well even though I had successfully booted the installer, without a harddrive to install it to, I was still stuck.
Or was I?
The games afoot!

Ok. Sata: bad. USB: good. And I had an external USB drive that I used for time machine backups on the mac. Odds were it was just a sata drive in a USB case. I took it apart and yup, just a sata case. Now we were cooking with gas. I swapped out my 2 TB back-up for the 500 GB windows drive and plugged it into the PC. I had to go back into the BIOS a bunch of times to make sure it was going to boot off the USB stick but after that, it all fired up smoothly and I could see the “external” 500 GB drive right there on the desktop. I WIN! Take that computer!
Merrily I followed the instructions and ran the installer. And then I hit a weensie bit of a hiccup. Remember the Windows 7 and 8 installs? Those partitions were right there along with a smaller boot partition. The Mint installer was giving me choice of which partition I wanted to install to. All I had to do was select one. I say this all pretty confidently now but at the time I was mucho confused and my fumbling around pretty much ended up making all the various partitions unusable by the time I was done f@cking around. Tony* would be so proud.

Fast forward at least a day of screwing around that involved grub errors and something called an “invalid arch independent ELF magic error.” Gotta love Linux programmers.
I finally got the drive cleaned off. I stripped it back to the bare bones and got it repartitioned properly with a working boot sector and then did a clean install of Linux Mint and lo and behold: it worked. I had a fresh install of Linux working and connected to the internet and my network.

Remotely interesting,
but too schtupid to be true
The purpose of this refurbished beauty was to sit somewhere out of the way and let me flail away on it. To that end I didn’t want to waste a keyboard/mouse/monitor on it. So I needed to remote in. I got SSH working fine so I could remote in via terminal (i.e. command line stuff like old school DOS commands but unix/linux ones instead) but ran into some snags when setting up VNC (Virtual Network Computing — a way to remote access and control a computer from another computer).
Long story short: x11vnc, which is the recommended vnc server for Linux Mint Cinnamon, which was a recommended install of Linux for beginners had a few issues with headless operation (i.e. no monitor attached). For one, it worked perfectly fine when you booted the computer with a monitor attached but introduced a 3 second delay to every mouse movement or click when you booted it without. As you can imagine this took me a while to discover as all my preliminary setup work was done with a monitor attached. On the other hand, all the other vnc servers I tried didn’t seem to play very nice with Cinnamon. Welcome to the freedom and tyranny of choice — there is a reason most people stick to Mac or Windows OS’s. The issue, after a lot of online searches turned out to be screen compositing (whatever the hell that was) and was a known bug…if I had known to look for it. Unfortunately Cinnamon has compositing baked in and you can’t turn it off like most of the “helpful” websites suggested.
Eventually I came to the conclusion that Cinnamon and I weren’t going to work out. Tragic really. So I tried Xfce, which was a lightweight desktop environment for Mint. Blech. Way too lightweight. Then came MATE, which is a fork of Gnome2, which was a variation of Gnome, which was one of the original linux desktop environments. And it came with a handy switch to turn off compositing. And just like Goldilocks, I found it just right.
In conclusion
I have my old PC up and running. It has three desktop environments to choose from, but I boot straight into MATE. I can access it via terminal or Mac’s built in screensharing. It has been running for 3 days now and hasn’t crashed, locked me out, or reset its compositing (which it was doing for a while after I installed MATE). I have now installed a ton of stuff (see below) and it is humming along (I forgot how loud the fans were) beside me connected only by an ethernet cable.
Ta-da!
I am pretty stoked. I can now move the box downstairs and offload some of my background processes to it and never really worry if I manage to screw it up because it really is a testing server. And Linux has some cool ways to “capture” a system image that you can revert to if you get to cute typing in commands you have idea what their purpose is — which I often do.

VNC and terminal, side-by-side, both looking remotely at the linux box.
Stay tuned.
Software to date
- ssh: to allow secure remote terminal access
- LAMP (Linux, Apache, MySql, PHP):
- Apache is the the webserver
- Mysql the database software
- php is the language to allow webpages to talk to the mysql databases
- Samba: to allow the linux box to share files with Windows and Mac computers
- VSCode: for programming and file editing
- Midori: a lightweight web browser in lieu of Firefox or Chrome
- Mate Tweak: to adjust a few additional settings
- Handbrake: for ripping dvds. I tried a couple and while it works it is very slow so I won;’t like use it for that purpose.
There are tons more things I could add like GIMP and Inkscape, but I don’t intend to use it as a workstation and it is a bit slow for any heavy duty lifting. Mint also has a lot of stuff preinstalled like a firewall, python3, video codecs, Firefox, VLC, ImageMagick, Libre Office and a ton of handy utilities —most of which I won’t use but are nice to have.
* Anthony (Tony) was our IT support person from Avante Garde Technologies back in the day and he made a tidy profit coming in and fixing the things I managed to screw up under the guise of trying to save money and time. Great guy.
No Knead Boule (Bread)

C’s recipe. I generally make a 2/3 batch which is good for two people. I also like to top it with coarse sea salt and Herbes de Provence.
- 3 cups flour
- 1/4 tsp instant yeast
- 1 1/2 tsp salt
- 1 1/2 cups water (room temp or cold)
Put the flour, salt and yeast in a bowl. Add the water. Mix with a wooden spoon until incorporated and dough is shaggy. No need to knead.
Cover with plastic wrap. Let sit for 12 to 21 hours.
Use as-is for pizza dough.
- For a boule, punch down the dough (use flour—it will be sticky), and form it into a ball. Roll the ball in flour. Cover loosely, and let rise until double (1 to 2 hours although you can get away with as little as 30 minutes).
- Put a Dutch oven with a lid in the oven, and heat it to 425°F for a minimum of 30 minutes—longer is better.
- Flop the risen dough into the hot Dutch oven; optionally top with coarse salt and a generous sprinkle of Herbes de Provence. A spritz of water will also make the crust a bit more crispy.
- Cover and bake in oven for 30 min.
- Remove the lid, and bake 15 minutes more.
Enjoy!


NYC Pizza Dough
New York style!
A 12–13” pizza (~63% hydration) that I usually double so I have one in the fridge for later. Perfect for 2 people.
If I have time this is the dough I make. It works best with at least 24 hrs to ferment in the fridge but I have successfully let it sit in the fridge for up to 5 days. If I want pizza last minute then I usually go for Ricardo’s dough recipe.

- 225 gm flour (~1 3/4 cups)
- 1/4 tsp (.8 gm) active dry yeast
- .5 tsp (3 gm) kosher salt
- .5 tsp (2 gm) sugar
- 143 gm lukewarm water (slightly less than 3/4 cup)
- .6 tsp (3 gm) oil (non virgin olive oil)
Mix dry ingredients, then add water & oil.
Mix, then knead ~8 minutes.
Put in sealed, oiled container for a minimum of 24 hours, and up to 5 days.
Warm dough at least 1 hr before using. Preheat oven and pizza stone to 525°F for around an hour.
Form into a ball and flour dough heavily. Flatten into a small (6″) circle. Create edge of crust by pulling the edges into the circle with your fingertips. Continue to spin dough and stretch from the edges in.
Transfer to a piece of parchment paper (or a heavily floured peel). Add sauce (not too much), pepper flakes and preferred ingredients. Top with cheese—you can get away with remarkably little if that is your jam.
Bake until the bottom is done to your particular preference (around 8–12 minutes)

Tasty and Easy Sauce
Open a can of plain tomato sauce and pour into a tupperware container. Add 4 or 5 glugs of extra virgin olive oil. Mince 3 or 4 cloves of garlic and add that in too. Add pepper flakes or dried oregano if you want but it’s not necessary. Store in fridge for a day or two to let it all flavourfy. Lasts for weeks.
Silly Assumptions
I’ve been doing a bunch of video work lately. Some quick and dirty editing of videos for NYCSS so they could do boat briefings remotely, a bunch more for a friend who is an instructor at NAIT and needed to do demos remotely, and finally I am just starting on some for L and her COVID-mutated instructional semester.
This has involved over 30 or so videos to date and well over 250 gig of data.
The Need for Speed
My 2015 Macbook Pro has been working like a champ and I really only ran into issues when copying massive files off the internal drive (500 gig with barely 100 gig left as working space) back and forth to my externals and rendering a few of the files with lots of adjustments. And I really didn’t think I could do anythingto speed up any of that without a huge investment of $$.
Turns out I was wrong.
Issue 1
I was using my external 2 terabyte usb/sata drive as both a repository for my cache files and storage for completed work. Copying a 4 gig finished file took 5 or 6 minutes and if I left it too long and had to transfer 15 or 20 gig it was etter if I just left and went and had a coffee.
I don’t remember what it was that got me looking at my USB hub, but at some point I noticed it was a cheapo one I had bought years ago and was strictly USB 2.0. That is to say 60 megabytes a second. I did a quick “About this Computer” and lo and behold the Macbook Pro physical usb ports were USB 3.0—that is to say rated for 500 megabytes a second. Um. But I still didn’t do anything about it because, well, math is hard. Then one of my 2 USB ports on the Macbook stopped working.
$37 dollars later and now things are really screaming. Silly, silly boy.
![]()
Issue 2
My trusty externals have been chuggin’ away like champs but because they are mechanical hard drives they can really only do one thing at a time — imagine they are remotely like a turntable: the read/write arm has to move back and forth across a physical “platter” constantly every time it performs an operation.
What the alternative? A SSD (solid state drives: essentially just big flash drives) which are purely electronic and have no moving parts. But SSDs are really expensive right?
Ummm. No.
At least not any more. I picked up a couple of high speed Samsung 500 gig SSD drives for ~$130/each. Scream-ing Fast. (See above screen shot.)

And so tiny!
So now I can fire stuff back and forth quickly and have an extra terabyte of space. And best of all if I dump my working cache files to one of them, it can also read/write asynchronously which helps to dramatically improve performance when I am working in Premiere and After Effects.
In summation
I made some pretty silly assumptions. The core of which was that technology, and most especially technology pricing, would stand still — with the corollary that my 5-year-old machine couldn’t be made to work faster and harder. I am especially chagrined by the USB hub debacle. $37 bucks. 8X faster (I finally did the math). Duh.
As an Aside
All this work has really been an awesome learning experience. I have honed my After Effects skills some more, learned to deal with a new kind of workflow, and best of all got to try out Adobe’s cloud-sharing to work collaboratively with others. We must of moved 300+ gig of files back and forth over the cloud.
I should set up shop doing fancy video effects for all those remote teachers and professors 🙂
Covid times…
I wrote this back in 2013 as part of my write-something-everyday project (It’s Novel).
7 years later it most certainly applies to my current thinking of the state of the world.
It changed everything and changed nothing. The mere existence, the actuality of it, the overwhelmingly realness meant that nothing could ever be the same. The reality shift had occurred and could never, ever be erased.
And yet nothing had changed. Planets orbited, children starved needlessly in wastelands while their neighbours nodded their heads. Young girls discovered love and old men counted their regrets like a miser counts his gold. The season slowly shifted, the morning was alive with sound and sun, and the birds started to get restless, eager to move on but not knowing why.
There were tasks to be performed and jobs to be done, just like yesterday; yet it was all so … different. And that difference was what it was all about. Or rather, the difference that the difference made. Everyone reacts differently to change and everyone is afraid of the unknown. Some revel in their fear and drink in the elixir from their adrenal glands, but many, even most, see it as a bizarre illness or an uncontrollable affliction that shreds their sanity simply by the fact of its existence.
Knowing things have irrevocable changed is often the reward for curiosity. And knowing it existed, changed it again.
Theme Code notes
A few Macblaze.ca specific fixes
To get my Instagram posts to play nice with flex rather than floats I added
.category-instagram .post-content{
  display:flex;
  flex-wrap: wrap;
}
Fixed the Headings CSS
Heading 1
Heading 2
Heading 3
Heading 4
Heading 5
Heading 6
Ascending post order
macblazev v 0.75.9
Back when I posted about changing the order of certain categories and/or all of them. But for some reason the feature seems to be missing from MacblazeIV which reversed the order on all categories. So I needed to put it back in.
What I came up with is this. It goes in the category.php file after if ( have_posts() ) and allows me to specify which categories are sorted by ascending order and which are descending. This snippet also allows me to specify posts per page which I didn’t end up using but I left in here for posterity.
< Changes display order for certain categories >


    $thiscat =  get_query_var('cat');
        $catobject = get_category($thiscat);
        $parentcat = $catobject->category_parent;
        $slugname  = get_category($parentcat)->slug;

                if (in_array($slugname, array('cat-1', 'cat-2')) || is_category(array('cat-3','cat-4')) ) {
                    query_posts( $query_string."&orderby=date&order=ASC&posts_per_page=2" );
                }
It’s based on https://stackoverflow.com/questions/19961130/wordpress-how-to-get-parent-category-id and essentially finds the current category, finds the the id of the parent category then uses an if statement to check if that parent is one of the categories in the array. Then it checks to see if the current category is listed (without having a parent) as one that should also have an ascending order.
Parents and individual categories are listed by their slugs.
Right now the parents are: array('Trips Etc.') — so that all trips under that category read front to back — and the individual categories I want ascending are array('its-novel','recipes-of-yore').
All-in-all it works, but I need a more elegant solution.
Useful links for the future
- https://stackoverflow.com/questions/891238/wordpress-php-way-to-test-if-pages-are-children-of-a-parent-page#comment698429_891284
- http://rachievee.com/wp-tutorial-how-to-apply-a-template-to-sub-categories/
- https://perishablepress.com/6-ways-to-customize-wordpress-post-order/
- https://code.tutsplus.com/tutorials/wp_query-arguments-categories-and-tags–cms-23070