Category: Art attacks
Love, Canadian Style.
Happy Valentines Day one and all, but most especially to Les. She’s away being smart at a conference and I am left to myself to moan and winge with the cats.
It’s not often I am alone on Valentines Day; since L and I celebrate it as our de facto anniversary, I can’t actually remember another time we have been separated. But I’m tough; I can take it…alone… with my cats… and a head cold.
Anyway, Leslie, I do miss you and hope you are having a great day. See you soon. Here’s my present:
3D motion
Here is an attempt to put together a bunch of 3D techniques with 3d animation, directional lighting and a moving camera.
Put together front to back in After Effects, although I probably should have done the sound in Premiere for more control.
Too Too Much Work
So here is my latest attempt at making movies. I have to say this is way too much work for the quality of final production. I think I put in about 30 hours in total (hence the lack of posts the last couple of days—I’m counting this as three posts…) and it still needs a whole lot of detail work. You can see why even short films have such a long list of people who work on various tasks and parts of productions.
Anyway here it is:
Production Notes
I started out creating the shadow figure in Illustrator again and importing the paths to After Effects for animation. My first attempt was using 10 separate shapes (2 for each limb, a torso and a head). Then I started to animate him, but soon realized I was no where near good enough an artist to be able to create all those poses from my head.
I grabbed my iphone, tripod and an umbrella and filmed myself going through the light sabre sequence, imported that into the AE timeline and started tracing using the shapes. Unfortunately the multiple shapes created a lot of work trying to keep everything aligned and, as you can see from the first 10 sec or so of the shadow figure’s sword fight, it creates a lot of gaps I would have to go back and fix.
I decided to redesign the figure in Illustrator, making him all one path (well 2 if you include the head) and start again. Rather than abandon the many hours I had already put in, I just started from where I was, so you will see a transformation in the figure’s shapes and consistency about half way through. This process was punctuated by a lot of Googling and video watching about rotoscoping and keyframes (and a lot of unhelpful screen hogging by Artemis). Eventually I finished the frame by frame rotoscoping and then realized, duh, I should have done the light saber itself at the same time.
So I went back and did it again. At 29 frames per second times 30 seconds, that is a lot of frames to go back through. Somewhere around there I switched to 10 frames a second for my sanity’s sake. The light saber shape—just the handle part—took about 4 tries to get animated. The first two times I tried to maintain the perspective, lengthening and shortening the handle as it moved in three dimensions, but I kept losing my tracking and somehow my previous work would then suddenly be off by a few inches, necessitating me doing it over again. By the 4th attempt I figured out how to just rotate the shape and move it along a path so I stuck with that. Not Star Wars quality, I know…
After that was done, which was the bulk of the aforementioned 30 hours, I added the actual ‘light’ to the saber using a great effects plugin. At this point having the umbrella on the original background footage was a godsend for measuring perspective. The plugin does some auto-reshaping based on motion with a lot of options to go in and manipulate it, but I decided to leave the auto default. It’s not that bad. Really.
Once that was done I added a intro and final sequence to try and add some story. The shapes again came from illustrator and I worked on trying to morph the ‘standard’ shadow figure to the animated one based on the video clip. A lot more video tutorials and Googling. As you can see I had varied success. A little bit of lightening, some experimentation with transitions, a bit more animation of the arrow into the light saber and I had an, albeit bad, storyline.
Next step was to export the combined working files into Premiere. Titles, sound effects, background music was all sloppily added (because I was tired… been walking all day…) and I was ready to render the final version. Posted above is the 800px version, but I have an HD quality one and its pretty damn sharp.
All this to say again, man, video effects takes a lot of time, even if you aren’t paying attention to detail. I think I should go back to writing nonsense posts again…
Note: I was dissatisfied with the rush sound-job I did, so I went back in and added a few more sound effects. Below is the original if you care to compare…
Putting it together
Okay, here’s a first attempt to put it all together and create some sort of workflow.
- Major elements drawn in Illustrator
- Imported to After Effects where the effects were added
- Finished composition put into Premiere where major transitions, sound effects and the extro were added
- Exported using Media Encoder
I added the lightening effects from AE’s prepackaged fx. The lightsaber effect is from a plug-in courtesy of Video Co-pilot. Sound effects are all free downloads with the majority from theforce.net. All in all, about 5 hours work, start to finish. If I was to take any care at all, I suppose I could triple that figure easily, not to mention how much time I saved by completely ignoring any smoothing of the animation; I will save that for when I have a gooder idea…
Cat-ittude
C suggested I try some whiteboard animation so I set up a quick test shoot and started playing with frame rates and intervals. This was one of my last, using a .5 sec interval and a 10 fps playback, but after I drew the cat face, I got some unexpected help.
A cleaner attempt with story and plot:
Clean up
Climbing Flash Show
The following was a page for the longest time but with the cleanup, I think it will be better suited as a post. It was originally done Nov 20, 2006.
In my spare time I’m working to rewrite VIRG’s website as a fun project cause their current one sucks. I made this as a header until I realized that every time you reloaded the main page the thing would start from the beginning. So for now it resides here. Enjoy!
OK. Well after all that it turns out when I built the SWF file I included autoplay. Since I no longer haver the source file it is proving virtually impossible to turn off the annoying music if the post is anywhere on the screen. So I moved it back to this page: Virg Slide Show
After Effects
The Adobe suite offers two tools for video composition. Premiere is the primary workhorse (and the software I have been using to date) and After Effects, which, I gather, was initially introduced to add effects after the main work was done—hence the name. Like all mature software in this fast changing age, the lines between packages has begun to blur and it seems one can do most simple projects in either Premiere or After Effects and there is no obvious (to a beginner) distinction or clear workflow; most searches conclude with a definite: it depends…
The following is my first attempt to work in After Effects. which on the surface use a very different work paradigm. The clip tests out a few of the plugins and methodologies and tries to use the AE workflow. The outcome isn’t as smooth because there are way more options to fiddle with and I am ignoring most of the fine tuning, but it looks like I will have much more fine control over animations and effects once I get the hang of it.
Also, as far as I can tell, AE allows you to import layered files from Photoshop and Illustrator. This means I can set up separate animated elements in the original .ai file rather than having to export each separate element in its own file as I did when doing the original animations in Premiere—huge time saver.
There is no audio and I fiddled to try and get a poster frame in there, so the initial screen didn’t look blank.
And getting silly with 3D…
visual id — in motion
Three variations on some video id packages
Timelapse
Mixing a bit of visual identity, video editing and timelapse. The view from my front window. An earlier version was posted on Facebook. Hopefully when my tripod arrives I can take this outside.
V2 with a better title clip but no music. A sunset this time…
And the piece de resistance: last night’s gorgeous sunset!
Oh, and happy birthday Dale. I forgive you for the leash thing! 🙂
Can I see some ID please?
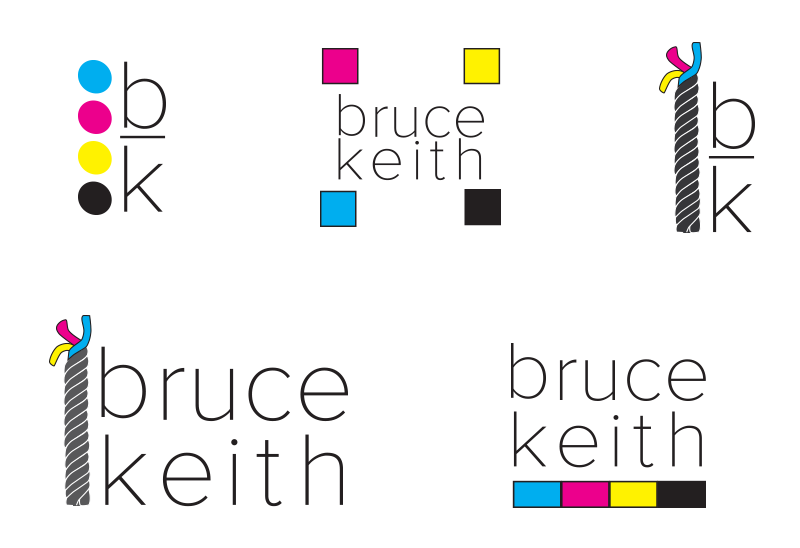
I moved on to another element that has characterized my working life these last 20 years; ink. C mentioned colour and printing the other day and I realized the CMYK (cyan, magenta, yellow & black) standard was a recognizable and suggestive element I could use. For those of you not in-the-know, mixing cyan, magenta and yellow gives you a muddy black, so printers add the 4th ink to sharpen up the blacks. These 4 inks are what all traditional colour printing uses. The black in the stacked bk rope is actually CMY…

Previous versions can be seen here.